
Your Shopping Cart


Affordable Cordless Handheld Vacuum for Car Cleaning: A Practical How‑To Guide
sunshine.universal.g@gmail.comEver stared at the mess in your car and thought, 'There has to be an easier way?' I feel you—those coffee crumbs, sand, and pet hair can turn a quick drive into a nightmare.
But what if you could grab a lightweight tool, zip it into the cup holder, and have the whole interior spotless in minutes?
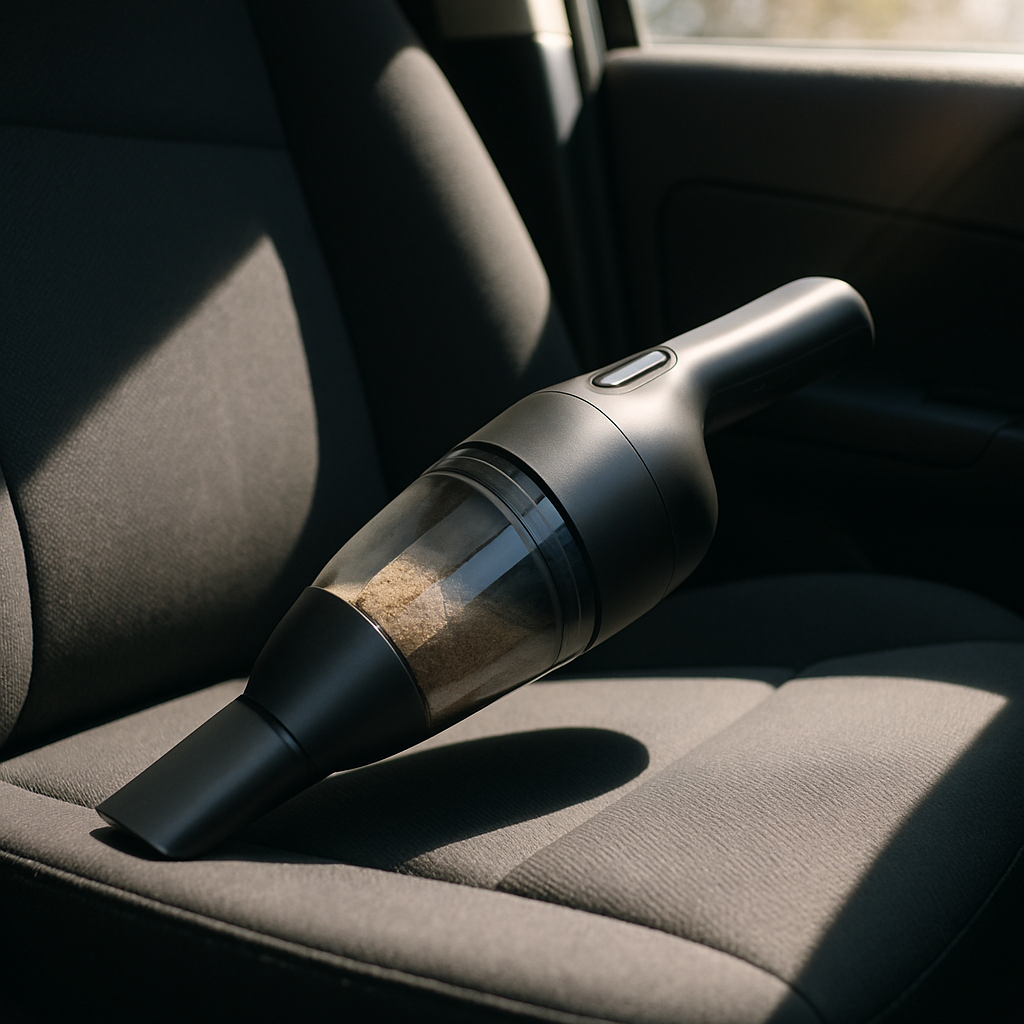
Enter the affordable cordless handheld vacuum for car cleaning—a gadget that promises power without the cord, and price that won’t make your wallet scream.
You don’t need a professional detailer’s kit to keep your ride fresh; a decent battery life and a decent suction rating are enough for most daily messes.
Think about it this way: you’ve already spent on a good pair of shoes, why not treat your car to a quick vacuum session while you’re on the go?
The best part? Most models under $100 still pack a motor that can lift sand from under seats and pull stubborn pet fur from fabric.
And because it’s cordless, you’ll never be tangled in a cord while trying to reach the trunk or under the pedals—just point, press, and watch the debris disappear.
Sure, you might wonder if a cheap vacuum can really handle the bigger messes. In my experience, the real trick is to clean regularly, so the motor never gets overwhelmed.
So, before you toss another napkin on the passenger seat, grab an affordable cordless handheld vacuum for car cleaning and give yourself a few minutes of peace of mind.
Ready to make that change? Let’s walk through what to look for—battery runtime, suction power, attachments, and that all-important price tag that fits your budget.
Stick with me, and you’ll leave the car‑cleaning dread behind, armed with a tool that feels like a small, friendly sidekick rather than a pricey appliance.
Let’s dive in and discover which models give you the most bang for your buck, without sacrificing the suction you need to keep your car spotless.
TL;DR
If you’re tired of crumbs, sand, and pet hair turning your car into a mess, an affordable cordless handheld vacuum for car cleaning gives you quick, cord‑free power.
Just pick a model under $100 with decent runtime and suction, and you’ll keep the interior spotless in minutes every single time.
Step 1: Choose the Right Affordable Cordless Handheld Vacuum for Car Cleaning
Ever stared at a pile of coffee crumbs in the footwell and thought, 'I could just toss the whole car out'? Yeah, I've been there. That's why the first thing you need is a vacuum that actually fits in your cup holder and won't scream like a jet engine.
But not every cordless mini‑vac will do the job. Some cheap models choke on sand, others run out of juice before you finish the backseat. So, before you hand over a few bucks, pause and run through the three things that separate a decent helper from a glorified dust bunny.
Consider Battery Runtime
A car vacuum that dies after two minutes is about as useful as a dead battery. Look for at least 10‑12 minutes of continuous suction on the high‑power setting—enough to clear the floor mats and the crevice under the driver’s seat. The Black+Decker Dustbuster, which earned Car and Driver’s Best Overall award, delivers roughly ten minutes of runtime while still pulling in crushed Cheerios and pet hair without choking (Car and Driver’s testing).
Don’t forget to check how long the charger needs to top up the pack. A vacuum that takes three hours to charge but only gives you ten minutes of run time will have you stuck in the parking lot waiting for a juice boost. Some models offer an Eco mode that stretches the battery to 20‑30 minutes at reduced suction—perfect for a quick touch‑up before you hit the highway.
Check Suction Power
Suction is the heart‑beat of any handheld vac. You don’t need industrial‑grade pressure, but you do want enough oomph to lift sand from under the seats and pull out the dreaded cat‑hair clump. A suction rating of 30‑35 inches of water (or a similar real‑world test) is a sweet spot for most budgets.
A quick home test can save you headaches: drop a quarter on the carpeted seat and see if the vacuum lifts it off the floor. If the coin stays put, the suction probably won’t tackle heavier debris like sand or dried food crumbs.
Look at Attachments
The next thing to scan is the tool kit that comes with the vac. A built‑in crevice nozzle is non‑negotiable—you’ll be fishing debris out of door jambs, cup‑holder seams, and HVAC vents. A flip‑down brush or motorized brush adds a gentle scrub for upholstery without scratching the fabric. If the package includes a flexible hose, you’ll reach the tightest corners without contorting your body.
Cleaning the filter after every few uses keeps the airflow steady and prolongs motor life. Most affordable units use a washable foam filter—just tap out the big particles, rinse with warm water, and let it air‑dry before snapping it back in.
Mind the Price Tag
Finally, bring the price into the conversation. The sweet spot for an affordable cordless handheld vacuum sits right around the $80‑$100 mark—cheap enough to keep you from second‑guessing the purchase, yet pricey enough to get a decent motor and a replaceable filter. Anything under $40 usually skims on suction, while models topping $150 start to feel more like a mini‑shop vac than a pocket‑sized sidekick.
A solid warranty can be a lifesaver. Brands that stand behind their vacs with at least a one‑year parts‑and‑service guarantee give you peace of mind, especially when you’re putting the tool through the rigors of daily car cleaning.
So, here’s the quick checklist: battery life ≥10 min, suction ≥30 inH₂O, crevice + brush tools, and a price tag that won’t make you wince. Grab a model that ticks those boxes, stash it in the glove box, and you’ll never dread that post‑road‑trip clean‑up again.
Step 2: Prepare Your Car for Cleaning
Alright, you’ve got your affordable cordless handheld vacuum for car cleaning tucked away in the glove box. Before you start sucking up every crumb, you need to give the car a quick once‑over so the vacuum can actually do its job.
Clear the Clutter
First thing’s first – take everything out of the footwells, under the seats, and the back of the front seats. Those stray receipts, half‑eaten snacks, or that spare toy you keep forgetting about will just jam the nozzle and make the suction feel weak.
It sounds simple, but trust me, I’ve spent way too many minutes chasing a bottle cap that rolled under the driver’s side. Toss it in the trash, or if it’s something you want to keep, set it aside on the passenger seat for a minute.
Shake Out the Mats
Pull out the floor mats and give them a good shake. If you have rubber mats, a quick tap against the door will loosen sand and dust. Fabric mats? A brisk shake outdoors works wonders. This step saves you from vacuuming the same sand over and over, which can quickly drain a cheap battery.
Pro tip: keep a small brush or old toothbrush handy. A quick sweep along the edges of the mat will dislodge hidden grit before you even turn the vacuum on.
Vent and Window Check
Open the windows just a crack. Fresh air helps any remaining dust stay loose instead of settling back onto the upholstery as you work. It also reduces the “vacuum‑scent” that can feel a bit stale after a few minutes of cleaning.
And while the windows are ajar, glance at the air vents. A quick puff of air through them can push out dust that would otherwise get sucked into the filter later.
Set Up Your Vacuum
Now that the interior is mostly empty, attach the right nozzle. For most car jobs, the crevice tool is your best friend – it slides into cup‑holder seams, under seat rails, and between console panels. If you’re dealing with pet hair on the seats, snap on the soft brush attachment; it agitates the fibers without scratching the fabric.
Don’t forget to check the dust cup. If it’s more than half‑full, empty it now. A full cup reduces suction dramatically, and you’ll end up wondering why your vacuum feels “weak” after just a few swipes.
Do a Quick Power Test
Turn the vacuum on for a second and point it at a loose paper bit on the floor. If the paper lifts easily, you’re good to go. If it just hovers, you either need a cleaner filter or a fresh charge. This tiny test saves you from a half‑hour of frustration later.
Speaking of charge, make sure the battery indicator shows at least 80 % before you start. Most affordable models give you around ten minutes of run time, and you’ll want that full burst for the deeper seats and trunk.
Final Walk‑Through
Take a quick walk around the cabin, just to spot any lingering debris that might have escaped your initial sweep. Look at the corners of the dash, the door pockets, and the trunk floor. Anything you see now is easier to grab with the crevice tool than to chase later.
Once you’ve confirmed the space is clear, you’re ready to let the cordless vacuum do what it does best – turn a messy car into a tidy sanctuary in minutes.
So, grab that vacuum, attach the crevice nozzle, and let’s make those coffee crumbs, sand grains, and pet hairs disappear. You’ve done the prep; now the real cleaning can begin.
Step 3: Use the Vacuum Effectively on Your Car’s Interior
Alright, the prep is done and your affordable cordless handheld vacuum for car cleaning is humming in your hand. Now it’s time to actually pull the debris out of every nook and cranny.
First, grab the crevice tool – it’s the skinny wand that slides into tight gaps like the space between the seat back and the door panel. This attachment does the heavy lifting for the hard‑to‑reach spots.
Start at the front footwell. Run the wand along the seam where the carpet meets the rubber mat, then sweep it under the driver’s seat rail. You’ll feel a little rush when a clump of sand or a stray popcorn kernel pops up.
Next, move to the center console. The crevice tip fits right into the cup‑holder gap and the little vent openings. A few gentle pushes forward and back pull out dust that would otherwise settle on your steering wheel.
Got pet hair on the seats? Snap on the soft brush attachment. The bristles lift hair without tearing fabric. Work in 10‑second bursts – the battery on most budget models starts to dip after a minute of continuous use, so give it a short break.
Now, flip the vacuum to suction mode for the larger areas – the floor mats, the trunk floor, and the rear seat backs. Sweep the wand in long, overlapping strokes; think of it like painting a wall. Overlapping ensures you don’t miss a speck.
A quick trick for stubborn grit: pause, tilt the vacuum so the suction port faces upward for a second, then release. The brief pressure change can dislodge particles stuck in carpet fibers.
While you’re working, keep an eye on the dust cup level. Most affordable cordless vacuums have a transparent window – when the cup is half‑full, you’ll still get strong suction. If it’s nearing the top, pop it out, tap out the debris, and snap it back in.
When you’ve finished the seats, give the dashboard a quick swipe with the brush attachment – it lifts dust from vents and speaker grills without scratching the plastic. A gentle pass is all you need; the motor’s suction will pull the particles into the cup.
Finally, do a quick sanity check. Walk around the cabin, run your hand over the seats, and listen for any whirring sound that indicates missed debris. If you feel a spot that still feels gritty, give it another two seconds with the crevice tool.
And that’s it – a clean interior in under ten minutes with an affordable cordless handheld vacuum for car cleaning. You’ve turned a chaotic cabin into a fresh, inviting space without breaking the bank or wrestling with a bulky shop vac.
Next time you hop in, you’ll notice the difference instantly – no lingering crumbs, just a fresh feel.
Step 4: Maintain Battery and Filter of Your Affordable Cordless Handheld Vacuum
Check the Battery Before You Start
First thing’s always the battery. Does the indicator show green, or is it blinking orange? If it’s anything less than 80 % you’re about to lose suction halfway through a quick clean.
Give it a quick charge habit: plug it in as soon as you pop the dust cup. A full charge on most budget models gives you around ten minutes of run time, which is plenty for a car interior if you keep the battery healthy.
So, what should you do if the charge seems sluggish? Try a brief reset – unplug, wait a minute, then plug back in. Many cheap vacs have a hidden firmware reset that clears a stuck charge cycle.
Clean the Filter After Every Few Uses
The filter is the unsung hero of suction. A clogged foam filter throttles airflow, making the motor work harder and draining the battery faster.
Pop the filter out, give it a gentle tap to shake loose big crumbs, then rinse it under lukewarm water. No soap needed; just make sure no suds linger because residue can attract dust later.
Here’s a trick: while the filter is drying, give it a little shake in the air or place it on a paper towel. Air‑dry for at least 15 minutes – never jam it back in while it’s still damp, or you’ll get a short‑circuit vibe.
Storage Tips That Save Power
After you’ve finished the job, store the vacuum in a cool, dry spot. Heat spikes in a hot car can age the lithium‑ion cell faster, shrinking runtime over months.
Ideally, keep it in the glove box with the battery at around 50 % charge if you won’t use it for a week or more. That balance prevents deep‑discharge and also avoids over‑charging.
And remember, the vacuum’s mouth should face downwards while stored. Dust doesn’t magically disappear, but a sealed opening keeps stray particles from sneaking into the motor.
When to Replace the Battery or Filter
Even the best cheap vac will lose a minute or two of runtime after a year of regular use. If you notice the charge dropping below five minutes on a full charge, it’s time to hunt for a replacement battery.
Filters are cheaper – most manufacturers sell a spare foam piece for a few bucks. If you see permanent discoloration or the foam won’t spring back after squeezing, swap it out.
Don’t wait until the motor starts whining or the suction feels feeble; proactive swaps keep the vacuum humming like new.
Quick Maintenance Checklist
- Check battery indicator – aim for >80 % before cleaning.
- After 3‑4 uses, remove the filter, tap out debris, rinse, and dry.
- Store in a cool, dry place; avoid leaving it in a hot car.
- Keep the mouth sealed when not in use to block dust.
- Replace battery after 10‑12 months of regular use or when runtime falls below 5 minutes.
- Swap the filter at the first sign of permanent discoloration or reduced spring.
By treating the battery and filter like you would a phone’s charger and screen protector, you’ll get more miles out of every dollar you spent on that affordable cordless handheld vacuum for car cleaning. A little routine now saves you the headache of a dead vacuum right when you need it most.
Step 5: Comparison of Top Affordable Cordless Handheld Vacuums for Car Cleaning
Okay, you’ve already got the battery and filter routine down. Now it’s time to figure out which little powerhouse actually earns its keep in the backseat.
Do you remember the last time a vacuum died on you halfway through a quick clean? Yeah, we’ve all been there. The good news is a handful of models hit the sweet spot between price, suction, and run‑time, so you don’t have to choose between power and pennies.
What matters most?
Battery life, suction strength, dust‑bin capacity, and the attachment kit are the four pillars that decide whether you’ll actually finish cleaning the car or end up chasing crumbs with a plastic fork.
We’ll break those down for each model so you can match them to the messes you face most often – pet hair, sand, or that stubborn coffee‑ground spill.
Top affordable picks
Ryobi 18V One+ Performance Hand Vacuum Kit
This Ryobi unit punches above its weight. It delivers about 18 minutes of continuous suction on the high‑power setting and recharges in under an hour, which is faster than most of its rivals.According to Wirecutter’s testing, its 2.8‑cup bin is double the size of typical budget hand vacs, and the pivoting brush makes those tight cup‑holder gaps feel easy.
Because the battery is part of Ryobi’s One+ ecosystem, you can swap in a spare if you ever need extra juice for a longer road‑trip clean‑up.
Black+Decker Dustbuster AdvancedClean+ HHVK515JP07
If pet fur is your daily nightmare, the AdvancedClean+ is the champ. Its motorized brush agitates stubborn hair while the built‑in, extendable crevice tool reaches under seats and into door seams.
The vacuum runs up to 24 minutes on low suction and 25 minutes on a gentler mode, giving you plenty of buffer for a full‑interior sweep. The bin is the largest we saw in the sub‑$100 range, and the washable filter keeps maintenance painless.
Black+Decker Dustbuster Blast HNVD220J00
Looking for the lightest, most wallet‑friendly option? The Blast clocks in at under $60, weighs just 2.4 pounds, and offers about 14 minutes of run‑time when you hold the trigger down.
It doesn’t have a motorized brush, but the built‑in crevice nozzle does a solid job on crumbs and small debris. The twist‑open bin empties quickly, which is handy when you’re hopping in and out of the car.
Black+Decker Dustbuster AdvancedClean Slim HLVC320J01 (budget alternative)
For those who want decent suction without the price tag of the AdvancedClean+, the Slim model gives you a respectable run‑time and a straightforward brush that works okay on upholstery. It’s a bit slower to charge (around 10 hours), so keep that in mind if you need fast turn‑around.
Now, let’s line up the numbers so you can see the trade‑offs at a glance.
| Model | Runtime (high) | Suction (inH₂O) | Bin Size | Price (approx) |
|---|---|---|---|---|
| Ryobi 18V One+ Kit | 18 min | ≈30 inH₂O | 2.8 cups | $90‑$100 |
| Black+Decker AdvancedClean+ | 25 min (low) | ≈35 inH₂O | 3 cups | $95‑$110 |
| Black+Decker Dustbuster Blast | 14 min | ≈30 inH₂O | 1.5 cups | $55‑$65 |
So, which one feels right for you? If you need the longest run‑time and love swapping batteries, Ryobi is the workhorse. If pet hair is the biggest enemy, the AdvancedClean+ gives you the brush power without breaking the bank. And if you just want a light, occasional clean‑up tool, the Blast is a no‑brainer.
Before you click “add to cart,” ask yourself: Do I need a motorized brush, or will the crevice nozzle suffice? Do I have a spare Ryobi battery lying around? Answering those questions will keep you from over‑paying for features you’ll never use.
Finally, remember that a good vacuum is only as reliable as its upkeep. Pair any of these picks with the maintenance routine we covered earlier, and you’ll keep your car interior looking showroom‑ready without spending a fortune.
Step 6: Deep Dive – Benefits of Cordless Over Corded Vacuums for Car Cleaning
Move freely, clean everywhere
Ever tried to yank a cord around the driver’s seat while the car’s moving? Yeah, that’s a nightmare. A cordless vacuum lets you slide under the pedals, reach into the trunk, and pop the crevice tool into the smallest door‑jamb gap without wrestling with a plug.
Imagine you’re on a road‑trip stop, coffee spill in the backseat, and you only have a minute before you hit the highway again. You just pull the vacuum out of the glove box, click the brush, and you’re done. No hunting for an outlet, no tripping over a dangling cord that could yank the vacuum out of your hand.
Power that matches the job
Most affordable cordless handheld vacuums for car cleaning give you between 10 and 25 minutes of high‑power suction – enough to tackle a full interior in one go. The trade‑off is that you won’t have unlimited power like a corded shop‑vac, but the battery life is predictable. When the timer hits 2 minutes left, you simply pause, empty the cup, and finish the last seat.
That predictability beats the “plug‑in‑and‑hope‑the‑circuit‑doesn’t‑trip” anxiety you get with corded units in a cramped cabin.
Storage that fits your car
Corded vacuums are bulkier, need a dedicated power strip, and often end up shoved in the trunk, taking up precious luggage space. A cordless model weighs under 3 pounds and slips into a cup holder or the glove compartment.
One of our readers told us she kept her vacuum on the passenger seat for a year – it never got in the way, and she could grab it the moment a sandstorm hit the backseat after a beach day.
Safety first, comfort always
Without a cord dragging across the floor, you eliminate a tripping hazard for kids and pets. You also avoid wear‑and‑tear on the cord itself, which can fray and become a fire risk over time.
And because you’re not tugging on a plug, the vacuum’s motor stays cooler, extending the life of that little lithium‑ion battery.
Attachments that actually work in a car
SharkNinja’s cordless vacuums come with a Mini Motorized Brush and a Duster Crevice Tool that bend to reach under seats, into cup‑holder seams, and along air‑vent grills. The MultiFlex® wand flexes at the handle, so you don’t have to contort your body to get to the back of the trunk.SharkNinja’s cordless vacuum features highlight how those brushrolls lift embedded debris and hair without the hassle of a cord.
In practice, you snap the crevice tool onto the wand, slide it into the narrow gap between the seat back and the door panel, and watch sand and crumbs disappear. Switch to the motorized brush on the fabric seats, and the bristles lift pet hair without snagging the upholstery.
Cost vs. long‑term value
At first glance, a corded vacuum might look cheaper because you only buy the machine once. But factor in the cost of extension cords, power strips, and the time you lose untangling cables. A solid cordless unit under $100 pays for itself after a few trips to the beach or a season of muddy kids.
If you’re budget‑conscious, look for models that offer interchangeable batteries – you can buy a spare for $20 and double your cleaning window without waiting for a charge.
Actionable checklist for choosing the right cordless over corded
- Confirm runtime ≥10 minutes on high suction for a full‑car clean.
- Check that the vacuum includes a crevice tool and a motorized brush for upholstery.
- Make sure the weight is under 3 pounds so you can store it in the glove box.
- Verify the battery is removable or that spare packs are affordable.
- Look for HEPA‑sealed or allergen‑locking bins if you have allergies – many cordless models, like SharkNinja, lock away 99.97% of dust.
Bottom line: the freedom, ergonomics, and smart attachments of a cordless handheld vacuum make it a far better fit for the cramped, mobile environment of a car than a clunky corded shop‑vac. You get the power you need, the flexibility you want, and a price point that stays friendly to your wallet.
FAQ
What makes an affordable cordless handheld vacuum suitable for car cleaning?
Because it’s light enough to slip into a cup holder, yet powerful enough to pull sand, crumbs, and pet hair from tight seams. You want a battery that lasts at least ten minutes on high suction, a removable dust cup under a cup’s volume, and the right attachments – a crevice tool for gaps and a soft brush for upholstery. All of that adds up to a tool that fits your car’s cramped interior without breaking the bank.
How long should the battery runtime be for a typical car clean?
Look for a runtime of ten to twelve minutes on the high‑power setting. That window lets you tackle the footwell, the seats, and the trunk in one go before the battery dips. If you often clean the whole cabin, a spare battery or a model that offers a low‑power “eco” mode can stretch the job to twenty minutes, giving you a safety margin for those unexpected messes.
Do I really need a motorized brush on a cheap vacuum?
If pet hair is a regular enemy, the motorized brush is a game‑changer – it agitates fur so the suction can pull it out instead of just pushing it around. For sand or dry crumbs, a simple brush or the crevice nozzle does the trick. So, you can skip the brush on a tight budget, but add it later if you notice hair clumping on fabric seats.
Can I use the same vacuum for pet hair and sand?
Yes, as long as the vacuum’s suction rating sits around 30‑35 inH₂O and the filter is washable. Start with the motorized brush for upholstery, then switch to the crevice tool for sand under the seats. Empty the dust cup frequently – sand fills it fast, and pet hair can clog the filter if you wait too long. A quick tap‑out keeps performance consistent.
How often should I clean the filter and empty the dust cup?
Give the filter a rinse after every three to four clean‑ups, or sooner if you notice a drop in suction. Let it air‑dry for at least fifteen minutes before snapping it back in. The dust cup should be emptied after each use; a half‑full cup already reduces airflow, and a full cup can make the motor work harder, draining the battery quicker.
Is it safe to store the vacuum in my glove box?
Storing it in the glove box is fine as long as the battery isn’t fully charged or completely dead. Aim for about a 50 % charge if you won’t use it for a week – that prevents deep‑discharge while avoiding over‑charging. Keep the vacuum mouth pointed downwards to stop dust from settling inside, and keep it away from direct sunlight on scorching days.
What’s the best way to choose between the Ryobi and Black+Decker models?
Start with what matters most to you. If you value longer run time and already own a Ryobi battery, the Ryobi 18V kit gives you up to eighteen minutes and a larger bin. If pet hair is your biggest headache, the Black+Decker AdvancedClean+ adds a motorized brush and a slightly higher suction rating. Compare price, battery ecosystem, and the specific attachments you’ll actually use before deciding.
Conclusion
We’ve walked through everything you need to pick, prep, use, and care for an affordable cordless handheld vacuum for car cleaning.
At the end of the day, the best tool is the one that actually stays charged long enough to get the job done, pulls sand and pet hair out of tight seams, and fits in your glove box without stealing precious trunk space.
Remember the quick checklist: battery ≥ 80 % before you start, empty the dust cup when it’s half full, swap the filter after a few uses, and always keep the crevice tool handy for those hard‑to‑reach spots.
Which model feels right for you? If you already own a Ryobi battery and need the longest run time, the Ryobi 18V kit is a solid match. If pet hair is your nemesis, the Black+Decker AdvancedClean+ gives you that motorized brush without blowing your budget.
So, what’s the next step? Grab the vacuum that ticks your boxes, give it a quick power‑test, and stash it in the glove box ready for the next road‑trip spill.
By treating the vacuum like any other car accessory – a little routine maintenance, a spare battery when you can afford it, and a habit of emptying the cup after each use – you’ll keep your interior looking showroom‑fresh for miles to come.
Ready to ditch the dusty dash? Click the “Buy Now” button on your favorite model and make every drive feel a little cleaner.
