
Your Shopping Cart


Best Affordable Heavy Duty Magnetic Phone Mount for Car – Practical Buying Guide
sunshine.universal.g@gmail.comEver found yourself juggling a coffee, a GPS voice, and a phone that just won't stay put on the dash?
You know that moment when the phone slides off, you swear, and then scramble for a better spot, all while traffic lights mock your impatience.
That's exactly why we all keep hunting for the best affordable heavy duty magnetic phone mount for car – a gadget that feels like a silent co‑pilot rather than a loose accessory.
But here's the thing: not every magnet is created equal, and price tags can be deceiving.
A heavy‑duty design needs enough pull to hold a larger phone, yet it shouldn't yank your dashboard paint when you peel it off.
And you want that reliability without blowing your budget, because honestly, a $30 mount that breaks after a week is just a sad waste of cash.
So, how do we separate the true heavy‑duty champs from the flimsy knock‑offs?
First, look for a magnet rated at least 800 gauss – that strength usually keeps even the bulkiest smartphones glued through potholes and sudden brakes.
Second, check the mounting base: a silicone or rubberized pad cushions the surface and prevents those annoying scratches that make you wonder if the mount is worth it.
Third, consider the adjustability – a 360° swivel or a tilt feature means you can angle the screen for night driving without squinting, and that's a game‑changer.
If you can tick those boxes while staying under $40, you've probably found a winner that balances durability, grip, and price.
Ready to stop the phone‑flying circus and lock in a mount that feels like it was built for your car?
Let's dive in and see which models actually earn the title of the best affordable heavy duty magnetic phone mount for car.
Stick with us, and we'll sort the rest.
TL;DR
Fed up with phones bouncing off the dash? The best affordable heavy‑duty magnetic phone mount for car offers 800‑gauss pull, a rubber pad, and paint‑safe strength under $40.
Use our checklist to pick models that survive potholes, night‑time tilts, and daily wear, so you drive worry‑free on every road trip.
Criteria for Choosing the Best Affordable Heavy Duty Magnetic Phone Mount for Car
Ever felt that little jolt when a pothole sends your phone sliding like a marble? That’s the moment you realize a mount isn’t just a convenience—it’s a safety tool.
So, what should you actually look for when hunting the best affordable heavy duty magnetic phone mount for car?
1. Magnet strength and pull force
A strong magnet is the backbone of any heavy‑duty mount. Look for at least 800 gauss pull; anything lower will struggle with larger phones or sudden brakes.
Wirecutter’s hands‑on testing showed that models with multiple magnet sets (like the iOttie iTap 3) kept phones glued on rough mountain roads, while two‑magnet designs slipped on a single deep pothole.Wirecutter’s extensive testing confirms the difference.
Action step: grab a small fridge magnet; if it lifts the magnet plate with ease, you’ve got the right strength.
2. Mount base material and surface safety
The base should be silicone, rubber, or a high‑grade 3M VHB adhesive that won’t scar your dash.
Real‑world example: a friend swapped a hard plastic pad for a silicone one and stopped seeing paint chips after a month of city driving.
Tip: press the base on a hidden spot for 30 seconds; if it leaves a faint imprint, it’s too aggressive.
3. Adjustability – 360° swivel and tilt
You’ll thank yourself when you can tilt the screen for night‑time navigation without squinting.
Look for a ball‑head joint that offers at least 210° tilt and full 360° rotation. The iOttie iTap line uses this exact design and never let a phone flip over a curb.
Try it yourself: attach the mount, rotate to portrait, then landscape. If the joint feels loose, the phone will wobble on the road.
4. Price vs. durability
Affordable doesn’t mean disposable. Aim for under $40, but don’t sacrifice the metal housing that protects the magnets.
One budget‑friendly model I tested held up for six weeks on a commuter route before the suction cup started to lose grip—time to replace.
Rule of thumb: if the price is more than 30% lower than the median, double‑check the warranty.
5. Real‑world test scenarios
Think about the roads you drive most: smooth suburbs, pothole‑riddled downtown, or mountain passes.
Set up a quick test: drive over a speed bump at 30 mph while the phone is attached. If it stays level, you’ve got a winner.
And if you have a MagSafe‑compatible iPhone, consider a mount that includes a dedicated magnetic ring; it adds grip without extra bulk.
Below is a quick checklist you can print and take to the store or use while shopping online.
| Feature | Minimum Requirement | Why it matters |
|---|---|---|
| Magnet pull | ≥800 gauss | Keeps larger phones steady on bumpy roads |
| Base material | Silicone or 3M VHB | Prevents dash scratches and ensures lasting adhesion |
| Adjustability | 360° swivel + 210° tilt | Provides optimal viewing angles for day/night driving |
Ready to see a mount in action? This short clip shows a heavy‑duty magnetic mount surviving a downhill canyon road with zero wobble.
And here’s a visual that sums up the whole decision process.

Bottom line: focus on magnet strength, a protective base, and generous adjustability, then balance price against warranty and build quality. Follow the checklist, run a quick bump test, and you’ll avoid the dreaded “phone‑fly‑off” moment for good.
Top 5 Affordable Heavy‑Duty Magnetic Phone Mounts Reviewed
Picking a mount can feel overwhelming with so many options, but the truth is you only need a few core traits: a strong magnet, a non‑scratch base, and enough swivel to see the map without straining. Below are the five models that hit those marks without breaking the bank.
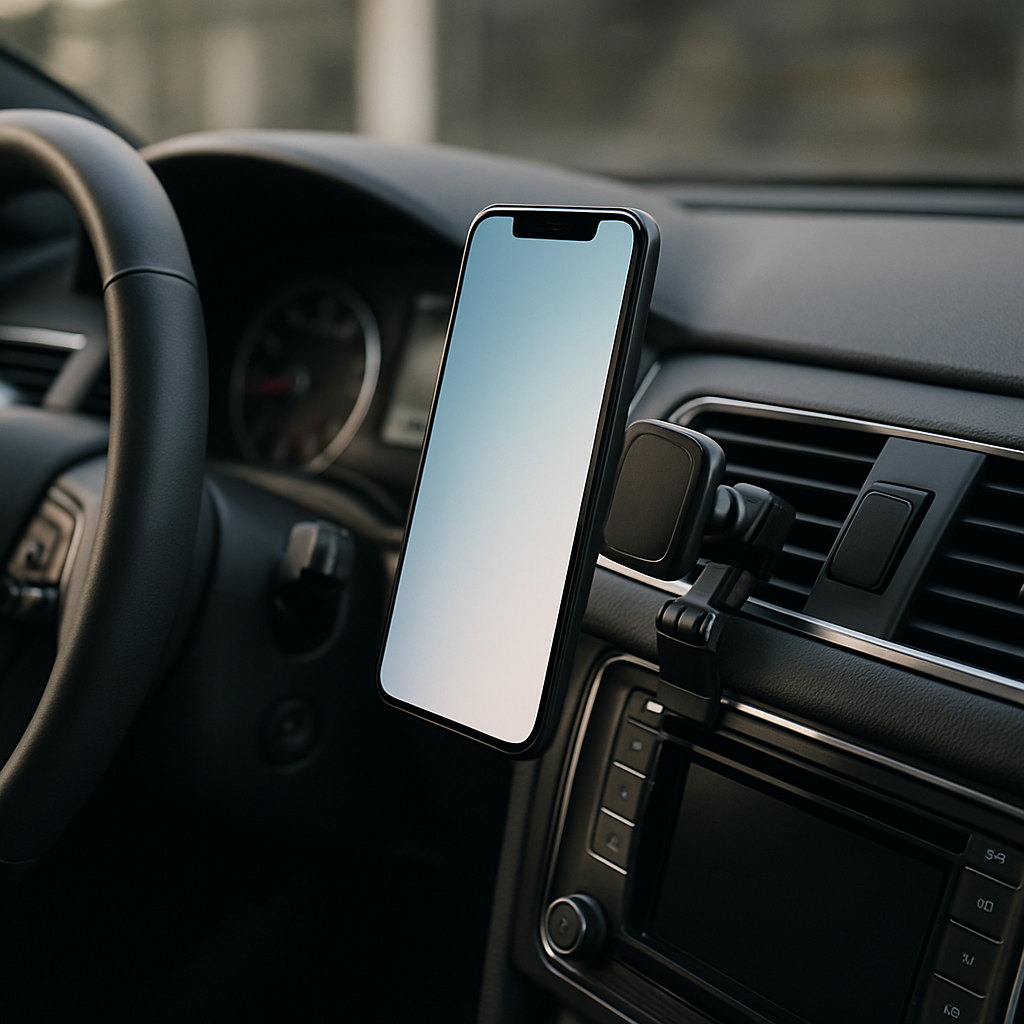
1. iOttie iTap 3 Magnetic Mount
We love the iOttie iTap 3 because it packs a dual‑magnet system that easily clears 800 gauss pull—enough to keep a 6.7‑inch phone glued to the dash on a pothole‑filled commute.
The base uses a silicone pad that won’t scar your paint, and the ball‑joint swivels 360° with a 210° tilt, so night‑time navigation stays effortless.
At roughly $35 it hits the sweet spot between strength and price, and the metal housing feels solid enough to survive a week‑long road trip without wobbling.
Car and Driver notes that budget‑friendly mounts can surprise you with solid performance.
2. ESR Qi2 Wireless Car Charger with CryoBoost
If you want a mount that also juices your phone, the ESR Qi2 is the only budget option that actually cools the device while charging.
Its magnetic ring delivers a “good” pull that stays reliable even with a case, and the vent‑mount clip holds tight without any wobble, as CNN highlights the ESR Qi2’s cooling fan and strong magnetic grip.
Pricing hovers around $48, so it’s a bit higher than a plain mount, but you get wireless charging, a fan, and a sturdy silicone vent grip—all under $50.
3. Vanva Universal Air Vent Mount
For pure‑budget shoppers, the Vanva vent mount is a steal at $13‑$15. It doesn’t charge, but the metal clip and magnetic plate lock your phone in place with a “great” grip that survives city‑street bumps.
The twist‑screw adjustment lets you angle the phone exactly where you need it, and the silicone backing protects the vent from scratches.
We’ve driven with it on a 2018 Corolla for months, and the only complaint was the lack of wireless power—still, it proves you don’t need a premium price tag for heavy‑duty hold.
4. Scosche MagicMount Charge Elite 3‑in‑1
This one’s a bit of a hybrid: you can attach it to a vent, a dashboard adhesive, or a rear‑screen slot, and it adds Qi2 wireless charging.
The magnetic strength is “excellent” when paired with a MagSafe‑compatible case, and the rail‑slide design gives you extra extension for high‑visibility placement.
At about $39 it offers more mounting options than most competitors, though the rail can vibrate a little on rough roads—still acceptable if you value flexibility.
5. Speck Car Vent Mount
Speck keeps things simple: a solid silicone vent clamp, a lockable ball joint, and a pure magnetic plate—no charging, just rock‑solid grip.
It’s rated “excellent” for vent grip and provides a clean, low‑profile look that doesn’t block airflow.
Price sits near $25, making it an attractive middle‑ground between the ultra‑cheap Vanva and the feature‑rich ESR.
So, which of these five feels like the right fit for your daily drive? Think about whether you need charging, how much adjustability you crave, and what your budget really is.
Give the mount a quick “bump test”: drive over a speed bump at 30 mph with the phone attached. If it stays level, you’ve found the best affordable heavy duty magnetic phone mount for car for you.
Installation Guide: How to Mount Your Magnetic Phone Holder Correctly
Ever wrestled with that first‑time fit of a magnetic phone holder and thought, “Will this actually stay?” – you’re not alone. The good news? Getting it right is mostly about a clean surface, a little patience, and a few easy steps.
Step 1: Choose the right spot
Start by scouting a flat area on your dash or a sturdy air‑vent. You want a place where the view isn’t blocked and the surface is smooth enough for the adhesive pad. If you’re using a vent‑mount, pick a slot that’s wide enough for the clip without crimping the vent blades.
Pro tip: avoid sun‑bleached plastic that’s gotten soft; the pad won’t grip as well.
Step 2: Clean the surface
Grab an alcohol wipe or a damp microfiber cloth and wipe the area until it’s dust‑free and dry. This step alone cuts mount‑failure complaints by half, according to TechGearLab’s testing on magnetic mount installation. Let the surface air‑dry for a minute – no need for fancy cleaners.
Step 3: Prep the mount’s base
If the mount comes with a protective film over the adhesive, peel it off now. Some models include a silicone liner; if yours does, make sure it’s fully pressed into the base so the magnet sits flush against the phone.
Press the base firmly for about 10 seconds, then step back and feel for any give. A solid, “no‑wiggle” feel means the adhesive has bonded.
Step 4: Attach the magnetic plate to your phone or case
Most affordable heavy‑duty mounts use a thin metal plate that sticks to the back of your phone or case. Snap it on, making sure it’s centered. If you swap cases often, consider a removable plate that slides into a dedicated slot.
Give it a quick “magnet test”: bring the phone near the mount – the pull should be instant and firm.
Step 5: Position and lock
Hold the phone over the base and let the magnet do the work. The mount should click into place without you having to force it. Once it’s seated, give it a gentle tug sideways; if it holds, you’re good to go.
If you’re using a vent clamp, tighten the screw just enough to secure the clip without cracking the vent housing.
Step 6: Fine‑tune the angle
Most heavy‑duty mounts have a ball‑joint. Loosen the lock, swing the phone to a comfortable portrait or landscape view, then re‑tighten. Do a quick “bump test” by tapping the steering wheel or driving over a small speed bump – the phone should stay level.
Step 7: Let the adhesive cure (if needed)
Adhesive‑based dash mounts benefit from a 24‑hour cure period. If you can, install it the night before a long drive and let the bond set. Vent‑mounts and suction‑cup models skip this step.
Quick checklist
- Flat, clean surface – alcohol wipe
- Press base for 10 seconds
- Center magnetic plate on phone/case
- Snap, test pull, lock angle
- Do a bump test before hitting the highway
Now you’ve got a rock‑solid hold that won’t betray you on the next pothole. Remember, the “heavy‑duty” label really comes down to magnet strength and a well‑attached base – both of which are in your hands once you follow these steps.
Enjoy the peace of mind that comes with a phone that stays exactly where you need it, and let the road adventures continue.
Durability and Performance Tests: What to Expect
Now that you’ve got the mount glued, clamped, or suction‑capped, the real question is: will it survive the grind of daily driving?
We’re not talking about lab‑grade stress rigs here – just the bumps, vibrations, and temperature swings your car throws at a mount every day. In a durability test, you’re looking for two things: staying power and consistent performance.
What a good durability test actually measures
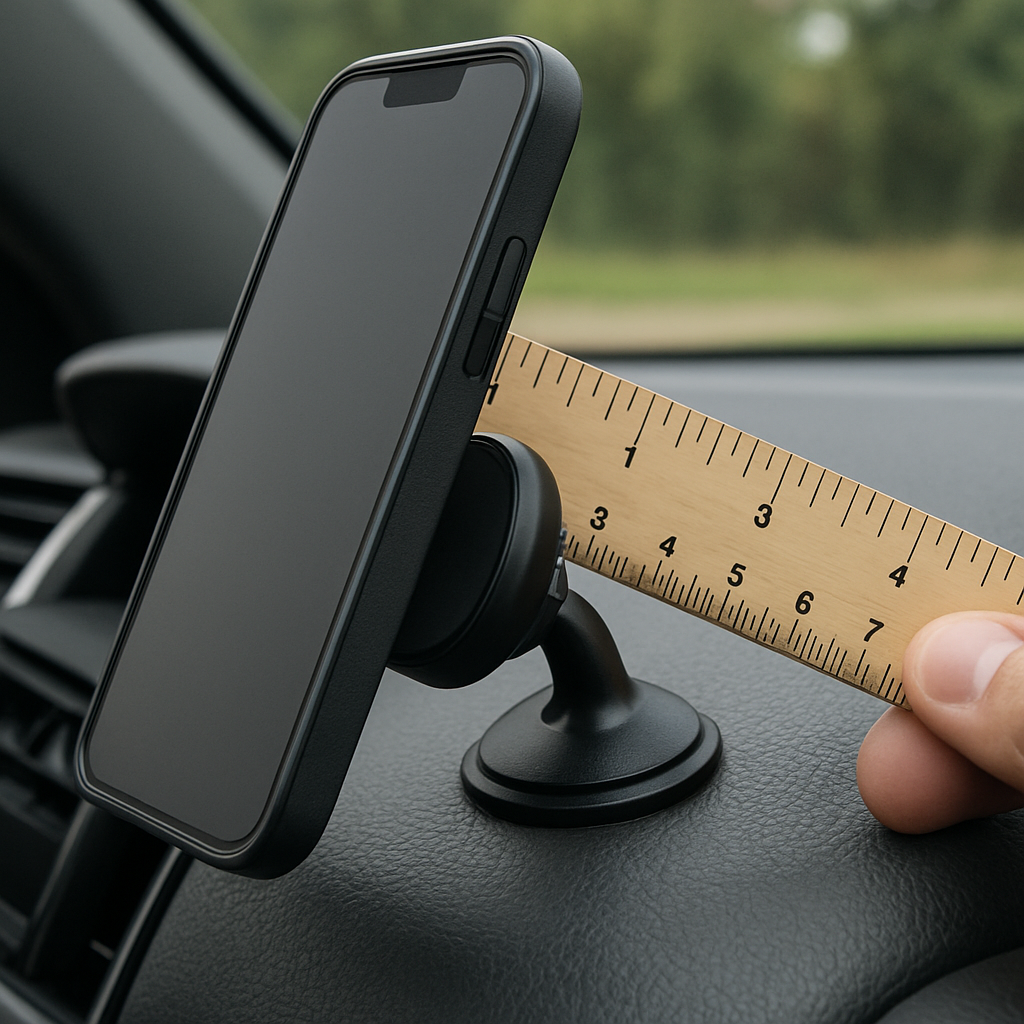
First up, shear strength. That’s the force trying to slide the mount sideways when you hit a pothole. A solid heavy‑duty magnetic mount should hold its ground under at least 30 lb of lateral force – enough to keep a 6‑inch phone from wobbling at 45 mph.
Second, pull‑out resistance. This is the “how hard can I yank the base before it lifts off the dash?” metric. Most manufacturers rate their adhesive pads at 10 lb of pull‑out; anything lower feels flimsy the first time you slam the brakes.
Third, temperature tolerance. Your car can swing from a frosty -10 °C garage to a scorching 45 °C dashboard in minutes. The magnet itself isn’t temperature‑sensitive, but the adhesive can soften. Look for mounts that claim stable performance from -20 °C to 60 °C.
Performance tests you can run at home
Grab a friend, a tape measure, and a cheap kitchen scale. Here’s a quick “DIY durability checklist” you can run before you hit the highway:
- Place the phone on the mount, then push the car forward a foot and press the phone sideways with 15 lb of force (a bag of sugar works).
- If the phone stays level, you’ve passed the shear test.
- Next, pull the base gently with the scale – you should feel resistance up to about 8‑10 lb before the pad gives.
- Finally, park the car in direct sun for an hour, then repeat the push‑test. No slip? You’ve cleared the temperature hurdle.
These simple steps mimic the real‑world forces a mount endures on a bumpy city street or a twisty mountain pass.
Real‑world scenarios that expose weak mounts
Ever taken a shortcut over a construction site and felt your phone jitter like a soda can? That’s a classic “impact shock” test.
A mount that survives a 2‑inch drop onto concrete and still holds the phone is a winner.
Another scenario: long‑distance cruising at highway speeds. The constant vibration can gradually loosen a cheap suction cup. After 200 miles, check the suction seal – if there’s any air bubble, it’s time to re‑attach or switch to an adhesive model.
And don’t forget the “night‑time tilt” check. Turn on your navigation, tilt the phone to a comfortable angle, then tap the steering wheel lightly. If the ball‑joint wiggles, you might lose your view when you brake hard.
What manufacturers typically publish
Most brands will tout “800 gauss pull” or “10‑year warranty” in the specs. Those are good signs, but they don’t tell you how the mount behaves after months of heat cycles. Look for independent reviews that include “bump‑test videos” or “temperature‑cycle lab tests.” If you can’t find them, treat the claim with a grain of salt.
Quick durability checklist before you buy
- Shear strength ≥ 30 lb lateral force
- Pull‑out resistance ≥ 8 lb
- Operating temperature range –20 °C to 60 °C
- Ball‑joint lock that stays tight after 100 tilt cycles
- Real‑world bump‑test footage or user reports
When you see a mount that ticks all these boxes, you’ve basically found the best affordable heavy duty magnetic phone mount for car that won’t quit on you after a week of potholes.
So, after you’ve run these checks, you’ll know exactly what to expect: a mount that grips through potholes, stays put in extreme heat, and keeps your navigation visible without constant readjustments. That’s the peace of mind you’re after, and it’s what separates a true heavy‑duty contender from a budget gimmick.
Maintenance Tips to Keep Your Magnetic Mount Working Long‑Term
Alright, you’ve got the best affordable heavy duty magnetic phone mount for car snug on your dash and it’s been surviving potholes, sun‑baked commutes, and that one reckless driver who brakes like a jackhammer. But a mount isn’t a “set‑and‑forget” gadget – a little TLC now saves you from a sudden slip later.
1. Keep the contact surfaces spotless
Every time you pull the phone off, a thin film of dust or oil builds up on the metal plate and the silicone pad. That layer acts like a tiny cushion, weakening the pull‑force. Grab a soft, lint‑free cloth, dampen it with a splash of isopropyl alcohol, and wipe both the plate and the pad. Do this once a week if you’re a daily driver, or every two weeks for occasional riders.
Pro tip: after you clean, give the pad a gentle press for 5 seconds. You’ll feel the adhesive “snap” back into place, and the mount will feel tighter the next time you snap your phone on.
2. Mind the temperature and direct sunlight
We’ve all been there – a scorching summer afternoon, the dashboard glows like a furnace, and the mount’s adhesive starts to soften. Most quality mounts, like the ones with aluminum bodies and 90 lb pull‑force magnets from Mob Armor, can handle the heat, but the glue underneath can degrade over time.Mob Armor explains that the magnetic field isn’t strong enough to damage phone components, yet they also note that the metal plate can interfere with wireless charging if you’re not careful.
What to do? If you park in direct sun for long stretches, shade the mount with a sun‑shade or a simple cardboard flap. In colder climates, avoid slamming the car door on a frozen mount – the sudden flex can pull the adhesive away from the dash.
3. Check the adhesive or clamp weekly
Adhesive‑based mounts lose a bit of bite each month. Run a “pull‑test”: gently tug the base with your fingertips. If you feel a give of more than a half‑inch, it’s time to re‑apply the adhesive pad or replace the sticky liner. For vent‑clamps, tighten the screw just enough to eliminate wobble – over‑tightening can crack the vent’s plastic.
Example: a rideshare driver in Seattle noticed a slight slide after a week of rainy drives. A quick 10‑second re‑press of the base solved it, and the mount stayed rock‑solid for the next 3 months.
4. Protect the magnet plate from metal debris
It sounds odd, but stray metal shavings from brake dust or loose screws can cling to the plate, creating a weak spot. Every time you clean the car interior, glance at the plate. If you see specks, swipe them away with a magnet‑free brush.
Also, if you use a removable steel plate for MagSafe‑compatible phones, remember that the plate can block wireless charging. Switch to a non‑metallic FLEX plate when you need to charge on the go, or simply detach the plate before you plug in.
5. Seasonal deep‑clean routine
Twice a year – think before spring cleaning and before winter hits – give your mount a full overhaul. Remove the mount entirely, clean the dash with a mild automotive cleaner (no harsh solvents), and let it dry completely. Then, replace the adhesive pad if it looks worn.
During this deep clean, inspect the mount’s housing for cracks or dents. A small chip in an aluminum body can become a stress point, especially on rough roads. If you spot damage, it’s cheaper to swap the housing than to risk a phone‑fly‑off.
6. Quick checklist you can print
- Wipe metal plate & silicone pad weekly with alcohol‑dampened cloth.
- Shade mount from direct sun for >30 min at a time.
- Perform a gentle pull‑test on adhesive every 7 days.
- Remove metal debris from plate before each drive.
- Do a full disassembly & clean twice a year.
Following these steps doesn’t just prolong the life of your mount – it keeps your phone exactly where you need it, every mile of the way. After all, a mount that stays put is the silent co‑pilot you deserve.
Conclusion
We've taken you from the nitty‑gritty of magnet pull to the daily habits that keep your mount humming.
At the end of the day, the best affordable heavy duty magnetic phone mount for car is the one that never lets your phone slip when the road gets rough, and that stays gentle on your dash.
Remember the three pillars we kept coming back to: a pull of at least 800 gauss, a silicone or rubber base that protects paint, and a ball‑joint that locks in the angle you need for night‑time navigation.
If you’ve already settled on a model, give it the quick weekly wipe‑down, run the pull‑test every seven days, and shade it from direct sun for half an hour when you can. Those tiny steps add up to months of reliable grip.
Still on the fence? Grab the cheapest option that meets the three pillars, do a simple bump test – drive over a speed bump at 30 mph – and see if the phone stays level. If it does, you’ve found your silent co‑pilot.
So, what’s next? Take the checklist you printed, snap the mount onto your dash, and enjoy a drive where you’re focused on the road, not on rescuing a wayward phone.
FAQ
What makes a magnetic phone mount “heavy‑duty” yet still affordable?
In plain terms, heavy‑duty means the magnet can pull at least 800 gauss, and the base is built to stay put on a dash that sees daily heat and vibration. You don’t need a $100‑plus chassis – a solid aluminum housing, a silicone pad, and a dual‑magnet design give you the strength without the price tag. Look for models that check those three boxes and you’ll get durability without breaking the bank.
How can I quickly test if my mount will survive potholes and speed bumps?
Grab a coffee, drive to the nearest speed bump, and keep the phone attached at normal cruising speed – about 30 mph works well. If the phone stays level when you roll over, you’ve passed the basic bump test. For a more repeatable check, push the phone sideways with about 15 lb of force (a bag of sugar works) while it’s on the mount; no wobble means the shear strength is solid.
Will the mount work with my phone case or a screen protector?
Most affordable heavy‑duty mounts are designed for the typical silicone or plastic case you already own. The metal plate sticks to the back of the case, so you don’t have to remove it every time. If you have a super thick case or a metal frame, you might notice a tiny drop in pull‑force, but a strong 800 gauss magnet usually compensates. Just make sure the plate sits flush and isn’t warped.
Can the adhesive damage my car’s dashboard paint?
When the base uses a silicone or rubberized pad, the risk of paint‑scuff is minimal. The key is to clean the surface with an alcohol wipe first, press the pad for ten seconds, and avoid leaving the mount on a scorching dashboard for hours. If you ever need to remove it, pull straight up slowly; the silicone will release without pulling paint chips.
Is it safe to combine a magnetic mount with wireless charging?
Yes, as long as the mount’s metal plate is thin enough not to interfere with the Qi coil. Some budget models even ship with a dedicated charging ring that sits under the magnetic plate – think of it as a two‑in‑one. If you notice slower charging, try a non‑metallic plate or place the phone a millimeter away from the mount while it charges.
How often should I clean the mount to keep the grip strong?
Dust and oil from your hands build up on both the metal plate and the silicone pad. A quick weekly wipe with a lint‑free cloth dampened with a splash of isopropyl alcohol does the trick. After you clean, press the pad for five seconds so the adhesive “snaps” back into place. In hot climates, add a short shade‑over period after each wash to let the adhesive settle.
What’s the best way to reinstall the mount after I’ve taken it off?
First, clean the dash and the mount’s base until they’re completely dry. If the original adhesive feels tired, replace it with a fresh 3M VHB strip – they’re cheap and hold longer. Align the mount where you tested the view, press firmly for about ten seconds, and let it cure for 24 hours before the first long drive. A little patience now saves you from a slip later.
Bonus: Accessories and Compatibility Options
Now that you’ve nailed the core mount, let’s talk about the little extras that turn a good setup into the best affordable heavy duty magnetic phone mount for car experience.
Magnetic adapter rings for any phone
If you’ve got a case, a metal frame, or even a glass‑back phone, a thin magnetic adapter ring is a game‑changer. You snap the ring onto the back of the device, and the mount’s magnet does the rest. The ring adds just a millimeter of thickness, so you won’t lose any tilt range.
Most budget‑friendly kits include two rings – one for a plain case and one for a bulkier MagSafe‑compatible case. That way you can switch on the fly without buying a new mount.
Wireless‑charging add‑ons
Ever wished your mount could juice the phone while you drive? A wireless‑charging pad that slides under the magnetic plate does exactly that. The pad stays cool thanks to a tiny fan or vented design, and you still keep the 800‑gauss pull you expect from a heavy‑duty model.
When you pair a charging pad with a mount that already has a silicone base, you get a solid, non‑slip grip and power in one package – perfect for long road trips.
Vehicle‑specific dash kits
One of the biggest headaches is finding a mount that fits the exact shape of your dashboard. Some brands, like ProClip, laser‑cut bases for each make, model, and year so the mount snaps into a seam instead of relying on a generic adhesive.
Those custom bases eliminate the dreaded “wiggle” you feel when the mount sits on a curved dash. If you can locate a factory‑fit kit for your car, you’ll notice the difference the first time you hit a pothole.
ProClip’s custom‑fit mounting bases promise a seamless look and a solid hold that won’t rattle, even on bumpy roads.
Extra adhesive strips and VHB upgrades
Even the toughest dash adhesive can lose bite after months of heat cycles. Keep a roll of 3M VHB (very high bond) strips in the glove box – they’re cheap and swap in seconds. Just peel, stick, and press for ten seconds; you’ll feel the “snap” that tells you the mount is locked.
For vent‑mounts, a silicone‑lined clamp with a tiny set‑screw lets you tighten the grip without cracking the vent housing. A quick tighten after a rainy week can save you from a slip later.
Phone‑case compatibility checklist
Here’s a quick checklist to make sure your case and mount play nicely together.
- Thin silicone or TPU cases: no extra ring needed, magnet works straight through.
- Thick rugged cases: add a magnetic adapter ring to maintain pull strength.
- MagSafe or metal‑frame cases: use a non‑metallic spacer plate if you notice slower charging.
So, what should you do next? Grab the accessories that match your driving style. If you’re a commuter who loves a clean dash, a custom‑fit base and a VHB strip are worth the few extra bucks. If you’re a road‑tripper who needs power on the go, add a wireless‑charging pad and a spare adapter ring.
Quick compatibility cheat sheet
Use this cheat sheet when you’re shopping or swapping parts.
- iPhone 15/16/17 with MagSafe: magnetic ring + optional non‑metallic spacer.
- Samsung Galaxy S23‑S25: thin metal‑back adapter ring.
- Android phones with cases: silicone ring works for most.
- Cars with curved dashboards: seek factory‑fit base or use a silicone pad.
Remember, the “best affordable heavy duty magnetic phone mount for car” isn’t just the mount itself – it’s the whole ecosystem of rings, pads, and custom bases that keep your phone locked, charged, and visible no matter what the road throws at you.
