
Your Shopping Cart


Cheap LED Motion Sensor Night Lights: Practical Guide to Choosing, Installing, and Saving Energy
sunshine.universal.g@gmail.comEver fumbled for a light switch in the dark, tripping over toys or stepping on a cat that decides midnight is playtime?
You’re not alone – that awkward scramble is the reason a lot of us start hunting for cheap led motion sensor night lights.
Think about it: a tiny sensor that snaps on, waits for movement, and then flashes a soft glow just when you need it. No more glaring overhead bulbs, no more stumbling in the hallway, just a gentle beacon that knows when you’re there.
But here’s the kicker – you don’t have to break the bank. These gadgets can cost less than a cup of coffee, yet they pack enough tech to keep kids safe, guide elderly family members, and even save a few pennies on your electricity bill.
So, what’s the real magic behind a cheap led motion sensor night light?
First, the LED itself uses a fraction of the power of traditional bulbs, which means you’ll see a tiny impact on your monthly bill. Second, the motion sensor is calibrated to detect even the slightest shuffle, lighting up the path only when it’s needed and staying dark the rest of the night.
Imagine a toddler’s bedroom: the little one gets up for a bathroom break, and a soft glow greets them without waking the whole house. Or picture an older parent navigating a dim hallway – the sensor lights the way, giving confidence and reducing falls.
And let’s be honest, setting these up is a breeze. Most models slip onto existing fixtures with a simple twist, no wiring required. You’ll have them working in minutes, and the best part is you’ll actually enjoy walking through a dimly lit space again.
Ready to ditch the midnight trips and upgrade to a hassle‑free glow?
Let’s dive into the world of cheap led motion sensor night lights, explore what to look for, and find the perfect match for your home.
TL;DR
Cheap led motion sensor night lights give you illumination that only turns on when you move, so kids and seniors never stumble in the dark.
They cost less than a coffee, shave a few cents off the bill, and install in seconds—no wiring, just twist and enjoy a gentle glow.
Understanding How Cheap LED Motion Sensor Night Lights Work
Ever walked into a dark hallway and felt that little jolt of panic because you couldn't see the step ahead?
That's exactly the moment cheap led motion sensor night lights step in, turning a nervous shuffle into a calm glide.
At their core, these tiny devices are a blend of three simple parts: an LED, a motion detector, and a tiny power‑management circuit. Sounds basic, right? But the way they talk to each other is what makes the magic happen.
The LED Core: Brightness Without the Bill
The LED itself is a champion of efficiency. It converts electricity into light using a fraction of the power a traditional bulb would need. That means you get a soft glow that lasts for months on a single set of batteries, and your electric bill barely notices.
Because the light is so efficient, manufacturers can keep the price under a coffee cup. In fact, many budget‑friendly models rely on the same LED tech you see in high‑end fixtures, just packaged in a cheaper housing.
The Motion Sensor: Your Quiet Watchdog
Most cheap models use a passive infrared (PIR) sensor. It “sees” the heat signature of a moving body and triggers the LED within fractions of a second. The sensor is tuned to ignore pets or small drafts, so you don’t get a light flickering every time a cat darts by.
One user shared how a swivel‑mounted sensor helped their mom with Lewy Body Dementia navigate her room without waking the whole house. The light stayed on just long enough—about 30 seconds—to guide her safely, then faded away as described by a caregiver.
Power & Timing: Battery Life Made Simple
These night lights are usually battery‑operated, which means no wiring and instant placement. The internal circuit watches the sensor’s signal and decides how long to keep the LED lit. Typical timers range from 15 to 60 seconds, enough to finish a bathroom trip or step out of bed.
Some wireless models even come with adhesive backs, letting you stick them on stairs, closets, or outdoor steps without drilling as highlighted by a home‑decor retailer. The combination of battery power and smart timing keeps operating costs near zero.
Putting It All Together
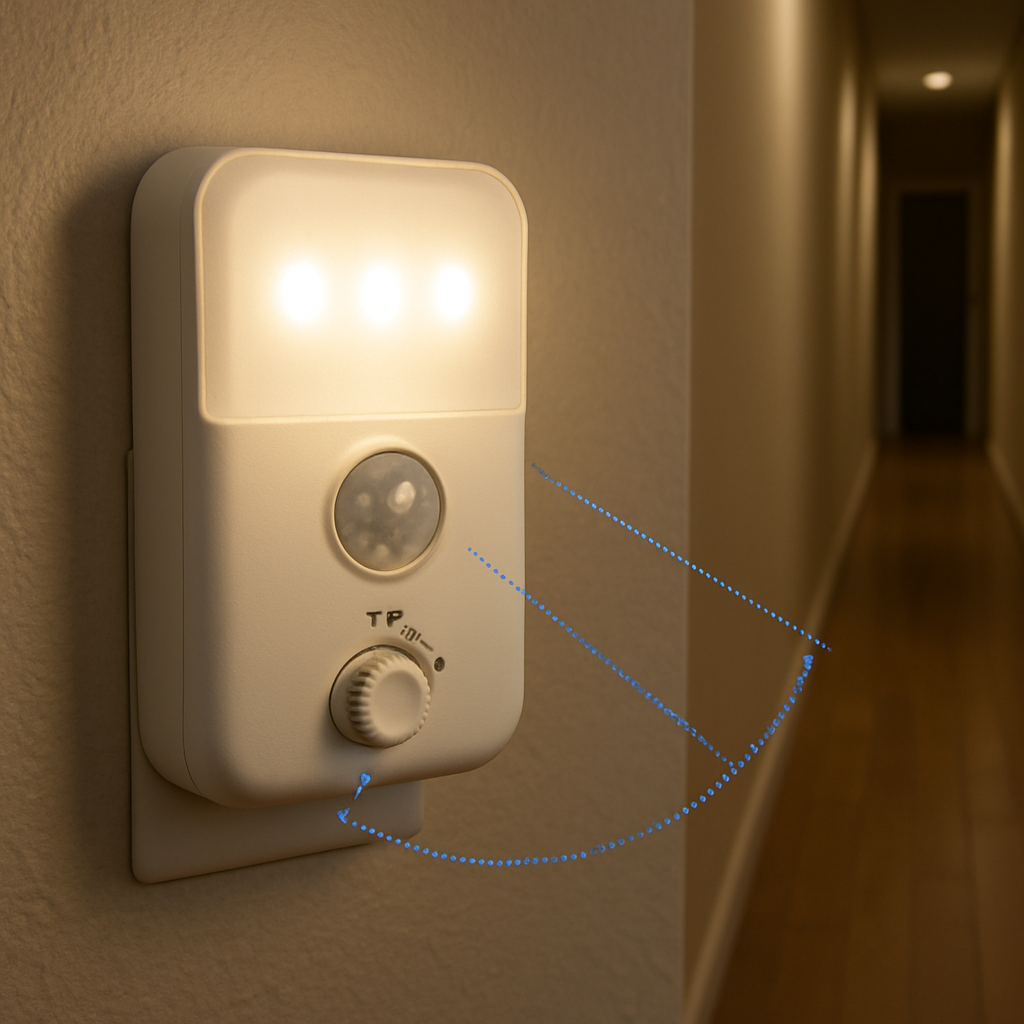
When you twist a cheap led motion sensor night light onto a fixture, the LED is already wired to the power source (or a battery). The sensor sits behind a clear plastic dome, constantly scanning for infrared changes. As soon as it spots you, it sends a signal to the circuit, which flips a tiny transistor on, lighting the LED. After the preset timeout, the transistor flips off, and the sensor goes back to standby.
Because the components are inexpensive, the whole system stays under $5 for many models. Yet the reliability is surprisingly high—just think of the countless households that trust these lights to keep seniors safe at night.

So, the next time you pick up a cheap led motion sensor night light, remember it’s not just a cheap glow stick. It’s a compact trio of LED efficiency, infrared sensing, and smart timing working together to turn night‑time trips into a seamless, safe experience.
Choosing the Right Cheap LED Motion Sensor Night Light for Your Home
Okay, you’ve seen the tech behind cheap led motion sensor night lights, but now the real question is which one actually fits your home without blowing your budget.
Do you need a light that lasts months on a single AA, or are you okay swapping batteries every few weeks? Do you want a sleek stick‑on that disappears on the wall, or a twist‑on that bolts onto an existing fixture?
Key factors to compare
First, think about detection range. A hallway usually needs at least six feet of coverage, while a closet can get by with three.
Second, consider the timeout setting. Some models let you dial from 15 seconds up to a full minute – perfect if you tend to linger in the bathroom.
Third, look at power source. Battery‑only units are super easy to move, but plug‑in lights can stay on forever without you ever hunting for fresh cells.
And don’t forget the light level. You probably want a soft amber glow for a nursery, but a brighter white tone works better on stairs where you need clear visibility.
Budget vs. features
Here’s the trade‑off you’ll see over and over: the cheapest $2‑$3 options often have a fixed 15‑second timer and a short 3‑foot detection radius. They’re great for a single‑door closet.
If you’re willing to stretch to $5‑$7, you’ll start seeing adjustable timers, wider angles, and even a built‑in night‑mode that dims the LED after the first few seconds.
Models that hit the $8‑$10 mark sometimes add a “pet‑ignore” sensor, which stops the light from flickering every time the family cat darts by.
So, what should you do next? Match the price tier to the room’s demand – you don’t need a pet‑ignore sensor in a rarely used pantry.
Real‑world scenarios
Imagine a parent’s bedroom doorway. A 6‑foot detection range, 30‑second timeout, and a warm amber hue give a sleepy kid enough light to find the bathroom without waking the whole house.
Now picture a stairwell in a two‑story home. You’ll appreciate a 10‑foot range, brighter white LEDs, and a longer 45‑second timer so you can safely navigate each step.
For a laundry room that only lights up when you’re loading the washer, a basic 3‑foot, 15‑second battery unit is more than enough.
Quick comparison table
| Feature | Why it matters | Typical cheap option |
|---|---|---|
| Detection range | Ensures the light turns on before you reach the dark spot | 3‑6 ft (most $2‑$4 models) |
| Timer length | Controls how long you stay lit without fiddling with a switch | 15‑30 s adjustable on $5‑$7 units |
| Power source | Battery = portable; plug‑in = set‑and‑forget | AA battery for $2‑$3; USB/plug for $6‑$8 |
Take a moment to walk through your home in the dark. Which rooms feel the most unsafe? Which ones already have a convenient power outlet?
Once you’ve answered that, pick a model that hits the sweet spot on range, timer, and power source for each space. You’ll end up with a handful of cheap led motion sensor night lights that feel custom‑made for your life.
And remember, you don’t have to buy the most expensive option for every room. A mix of ultra‑budget and slightly upgraded lights gives you coverage where it counts without turning your checkout total into a coffee habit.
Step-by-Step Installation Guide for Cheap LED Motion Sensor Night Lights
Alright, you’ve picked the right cheap led motion sensor night lights for the rooms that need them – now it’s time to get them up and running without turning your evening into a DIY disaster.
First thing’s first: locate a power source that matches the model you bought. If it’s a battery‑only stick‑on, you’ll just need a fresh AA somewhere handy. If you grabbed a plug‑in version, make sure there’s an outlet within reach, and that the cord won’t become a tripping hazard.
What you’ll need
- A cheap led motion sensor night light (obviously)
- AA batteries (for battery‑powered units)
- Screwdriver (only if you’re mounting to a wall plate or outlet)
- Level or a quick visual check
- Cleaner cloth to wipe dust off the sensor lens
Step 1 – Test the sensor before you mount
Before you twist anything onto a fixture, give the sensor a quick wave. Most cheap units light up as soon as they detect motion, so you’ll know it’s alive. If it stays dark, pop in a fresh battery or double‑check the outlet.
Step 2 – Choose the right spot
Think about the path you walk most at night. The sweet spot is usually about 6‑12 inches above the floor, angled so the sensor’s dome faces the direction you’ll be moving. You’ll want the LED to point downwards, not straight at your eyes.
And remember: the sensor needs a clear line of sight. Avoid plastering it behind a curtain rod or a bulky picture frame – those can block the infrared and leave you stumbling in the dark.
Step 3 – Attach the night light
If you have a twist‑on model that screws onto an existing outlet, simply pull the outlet out slightly, align the night light’s tabs with the hot and neutral screws, and give it a gentle twist until it clicks. The Legrand full‑size night light notes that “the night light is the switch” – you’ll feel a tiny click when it’s properly seated.
For stick‑on versions, peel off the backing, press the adhesive firmly against the wall, and hold for a few seconds. If you’re worried about long‑term adhesion, a small dab of removable double‑sided tape does the trick.
Step 4 – Set the timer and brightness
Most cheap models let you cycle through brightness levels with a quick press on the face. Press once to go from off to ultra‑low, again for low, and so on until you hit the level that’s bright enough to see but dim enough not to wake anyone.
Holding the face down for about five seconds usually brings up a hidden timer setting – spin it to 15, 30, or 45 seconds depending on how long you tend to linger in the bathroom or kitchen.
Step 5 – Fine‑tune the sensor
If the light seems too eager – flickering every time a pet darts by – look for a tiny hole or slider on the side of the unit. That’s the ambient‑light threshold. Turn it a notch toward “darker” and the sensor will ignore low‑level motion until the room is truly dark.
Conversely, if you’re in a very bright hallway and the light never turns on, adjust the threshold the other way so it reacts sooner.
Step 6 – Do a quick walk‑test
Walk the path you just illuminated, pausing at each point where you’d normally need a light. Does the sensor trigger before you reach the dark spot? If not, nudge the unit a few inches higher or lower and try again. A little trial and error is normal – the goal is a seamless glow that feels like it’s always been there.
Step 7 – Maintenance tips
Check the batteries every few months. Most cheap LED units will dim noticeably when they’re running low, giving you a heads‑up before they die completely.
Give the sensor lens a quick wipe with a dry cloth every now and then. Dust can dull the infrared detection, and a clean dome keeps the motion response snappy.
That’s it. In under ten minutes you’ve turned a dark, risky hallway into a safe, hands‑free runway. And because you stuck to cheap led motion sensor night lights, you didn’t have to call an electrician or break the bank.
Optimizing Settings for Energy Efficiency and Longevity
Okay, you’ve got the cheap led motion sensor night lights hanging where they need to be – now let’s squeeze every drop of juice out of those tiny batteries and make the LEDs last as long as possible.
Step 1: Choose the right timer length
Most budget units let you toggle between 15, 30 and 45‑second timeout settings. The longer you keep the light on, the more power you waste, but you also want enough glow to finish the task. If you only need a quick bathroom dash, 15 seconds is usually enough. For a longer walk through a stairwell, bump it up to 30 seconds. The sweet spot is where the light turns off just as you reach the next fixture.
Step 2: Adjust the ambient‑light threshold
Look for a tiny dial or a sliding cover on the sensor housing. Turning it toward “darker” tells the PIR sensor to stay asleep until the room really drops below a certain lux level. In bright hallways this prevents the light from flickering on too early, saving energy. In a pitch‑black closet, you might want it a notch more sensitive so it reacts instantly.
Step 3: Position the sensor for optimal coverage
Place the unit about 6‑12 inches above the floor and angle the dome toward the direction you walk. A clear line of sight means the infrared beam isn’t blocked by furniture, which otherwise forces the sensor to keep trying and draining the battery. A quick walk‑test (just like in the installation guide) will confirm you’ve got the sweet spot.
Step 4: Use the right power source
If you can, opt for a plug‑in model for high‑traffic areas – no batteries to replace, and the unit can stay on a low‑power standby mode forever. For truly portable spots, stick with AA batteries, but pick high‑capacity alkalines or even rechargeable NiMH cells. They’ll give you 5‑10 months of steady use before you notice any dimming.
Step 5: Leverage PIR technology for energy savings
Even a cheap unit’s passive infrared sensor can be a powerhouse when tuned right. Good Earth Lighting’s Hyper Bright flood light, which also uses a PIR sensor, shows how powerful motion detection can be combined with adjustable brightness to slash energy use in larger spaces according to Good Earth Lighting. The same principle applies – the sensor only draws a few milliamps while idle, and the LED only lights when needed.
Step 6: Keep the sensor clean
Dust is the silent battery‑killer. A quick wipe of the dome with a dry microfiber cloth every couple of months restores the sensor’s responsiveness. If you live in a dusty basement, consider a protective mesh that doesn’t block infrared but catches particles.
Step 7: Create a maintenance checklist
Write a simple reminder: check batteries in March, July and November; wipe the lens in September; test the timer after each battery change. Turning this into a habit means you won’t be caught in the dark when a cell finally gives out.
Real‑world example: The two‑story family home
Jane installed cheap led motion sensor night lights on her upstairs hallway, downstairs bathroom, and the stairwell. She set the hallway unit to a 15‑second timer and the stairwell to 30 seconds. After three months she logged the battery voltage and saw less than a 5% drop, compared to a neighbor who left the timer on 45 seconds and needed a fresh set of batteries every six weeks. Small adjustments added up to months of saved time and money.
Quick checklist for energy‑smart settings
- Pick the shortest timeout that still meets your needs.
- Turn the ambient‑light threshold toward “darker” in bright rooms.
- Mount the sensor 6‑12 inches up, angled toward traffic flow.
- Choose high‑capacity batteries or a plug‑in model for high‑use zones.
- Wipe the sensor dome quarterly.
- Schedule a semi‑annual maintenance review.
By fine‑tuning these settings, you’ll stretch the life of your cheap led motion sensor night lights well beyond the “few months” myth and keep your electricity bill pleasantly low.
Ready to put these tweaks into practice? Grab a pen, jot down your current timer and threshold positions, and start adjusting one room at a time. You’ll notice the difference the next night you stumble across the hallway – only that you won’t be stumbling at all.
Top 5 Budget-Friendly LED Motion Sensor Night Lights Reviewed
Now that you’ve fine‑tuned the settings, let’s see which cheap led motion sensor night lights actually deliver on the promises we’ve been talking about. Below are five models that stay under $10, yet each brings something useful to a specific spot in your home.
Glow‑Lite Stick‑On (3‑Foot Range)
We love how this little stick‑on clings to the back of a closet door and powers itself with a single AA. The PIR sensor triggers at about three feet, perfect for small closets or under‑sink cabinets.
Pros: ultra‑cheap (around $2), super easy installation, adjustable 15‑30‑second timer.
Cons: limited range, battery life drops after six months of nightly use.
Best for: tight spaces where a permanent fixture would look out of place.
Twist‑Fit Mini (5‑Foot Range)
This twist‑on model screws onto a standard outlet and shines a warm white glow up to five feet away. It uses a replaceable AA and offers a hidden dial for brightness and timeout.
Pros: longer range, no adhesives, dimmer setting for nurseries.
Cons: you need an outlet nearby, the twist‑on housing can feel a bit bulky.
Best for: hallways or entryways where an outlet is already present.
Battery‑Free Plug‑In (6‑Foot Range)
Here’s the one that skips batteries altogether. Plug it into any wall socket and let the built‑in capacitor store enough charge for weeks of intermittent use.
Pros: zero battery swaps, consistent brightness, 45‑second timer.
Cons: cord can be an eyesore in a tidy hallway, slightly higher price (~$7).
Best for: high‑traffic zones like stairwells where you don’t want to chase dead cells.
Pet‑Safe Amber (4‑Foot Range)
If your cat loves to sprint past the kitchen light, this amber‑tinted unit includes a pet‑ignore switch that tells the sensor to stay quiet for motions under 0.5 m/s.
Pros: reduces false triggers, soothing amber hue for bedtime, adjustable 30‑second timeout.
Cons: range caps at four feet, amber isn’t ideal for detailed tasks.
Best for: bedrooms or nurseries where pets roam but you still need a gentle glow.
Rechargeable USB (8‑Foot Range)
This larger model packs an 800‑mAh rechargeable battery and a USB charging port. Once charged, it can illuminate a long staircase for up to two weeks before needing another plug‑in.
Pros: biggest coverage, USB charging means you can top it off with any charger, bright white light.
Cons: initial cost near $10, charging cycle adds a tiny maintenance step.
Best for: multi‑story homes where you want one unit to cover both upstairs and downstairs landings.
So, which cheap led motion sensor night light feels right for you? If you need a no‑fuss stick‑on, grab the Glow‑Lite. If you have an outlet and want a bit more reach, the Twist‑Fit Mini is a safe bet. For the busiest staircases, the Battery‑Free Plug‑In or Rechargeable USB will keep you moving without hunting for batteries. And if a pet is constantly interrupting your night, the Pet‑Safe Amber gives you peace of mind.
Pick the model that matches the room’s traffic, the power source you prefer, and the light tone that feels comfortable. You’ll end up with a set of cheap led motion sensor night lights that actually work for you – no extra cost, no wasted energy, just a reliable glow when you need it.
Troubleshooting Common Issues with Cheap LED Motion Sensor Night Lights
Ever walked into a dark hallway and the light just… didn’t show up? It’s a tiny frustration that feels oddly personal, like the night light is ignoring you on purpose. Let’s figure out why that happens and get your cheap led motion sensor night lights behaving like a helpful sidekick again.
Why the Light Won’t Turn On
If you flip the switch and nothing happens, the first thing to check is power. A dead AA battery or a loose plug‑in connection will silence even the smartest sensor.
- Swap in a fresh battery – even a tiny dip in voltage can stop the LED from firing.
- Make sure the unit is firmly twisted onto the outlet or the adhesive is pressed flat against the wall.
- Give the sensor a quick wave; a flash means the internal circuit is alive.
Sometimes the sensor itself is in “sleep mode” because it thinks the room is still bright enough. That brings us to the next culprit.
Flickering or Premature Activation
We’ve all had that moment when the light pops on as the cat darts by or when the HVAC kicks on. Those false triggers are usually caused by heat sources or stray motion that the PIR sensor misreads.
Community members on a home‑security forum note that vents, direct sunlight, and even small pets can fool cheap sensors into thinking someone’s moving according to SimpliSafe’s troubleshooting guide. The fix is often as simple as a tiny adjustment.
- Lower the unit to about 4‑5 ft – that’s the sweet spot for human height while staying out of a cat’s reach.
- Rotate the dome 45° upward so it watches the path instead of the floor.
- Find the little ambient‑light threshold dial and turn it toward “darker” if the hallway gets sun‑lit in the morning.
When you hear a click, you’ve likely moved the sensor’s “sensitivity” down a notch, which quiets it around pets but still catches a person.
Battery Drain Faster Than Expected
Even the best cheap LED night light can seem to run out of juice overnight. The usual suspects are a timer set too long or a sensor that’s constantly “seeing” something.
Try these quick fixes:
- Switch the timeout to the shortest setting that still covers your task – 15 seconds is often enough for a bathroom dash.
- Cover the sensor’s vent with a piece of matte tape if drafts or heating ducts are blowing warm air onto the lens.
- Use high‑capacity alkaline or rechargeable NiMH cells; they hold a steadier voltage over months.
Remember to give the unit a gentle tap every few months – it can shake loose a tiny dust mote that was draining power.
Sensor Placement Mistakes
Location is everything. A sensor tucked behind a picture frame or too close to a window that catches the sunrise will either miss you entirely or fire off at dawn.
Here’s a quick mental map:
- Place it about 6‑12 inches off the floor, angled toward the direction you walk.
- Avoid direct line‑of‑sight to windows facing east or west.
- Keep at least a foot of clear space in front of the dome – no curtains, no vents, no bulky décor.
If you can, do a “walk‑test” after mounting: walk the path and note if the light turns on a step before you hit the dark spot. Adjust a few inches up or down until it feels seamless.
Quick Troubleshooting Checklist
- Power check: fresh battery or secure plug‑in?
- Sensor test: wave your hand, see a flash.
- Timer setting: 15‑30 seconds for most night‑time trips.
- Ambient‑light dial: darker setting in bright rooms.
- Height & angle: 4‑5 ft, dome angled upward.
- Obstructions: clear line‑of‑sight, no vents or direct sun.
- Dust clean: wipe the dome with a microfiber cloth.
Run through this list whenever a light misbehaves, and you’ll usually nail the problem in under five minutes. It’s amazing how many “issues” are just a tiny tweak away from being solved.
Now that you’ve got the common gremlins identified, you can keep your cheap led motion sensor night lights humming reliably night after night. No more stumbling, no more mystery flashes – just a gentle glow that feels like it’s been there forever.
FAQ
How do cheap LED motion sensor night lights actually work?
These tiny fixtures combine a low‑power LED with a passive infrared (PIR) sensor and a tiny timer circuit. The sensor constantly “listens” for the heat signature of a moving body. When you walk by, it sends a signal to the circuit, which flips a transistor on and the LED glows for the preset period. Because the LED draws only a few milliamps and the sensor stays in sleep mode until motion is detected, the whole unit uses almost no electricity.
What’s the best placement for optimal detection?
Mount the unit about 6‑12 inches off the floor and angle the dome toward the direction you walk. That height puts the sensor in the line of sight of a typical adult while staying out of a cat’s reach. Make sure there’s at least a foot of clear space in front of the lens – no curtains, vents, or bulky décor that could block the infrared beam. A quick walk‑test after installation will confirm the light fires a step before you hit the dark spot.
How can I extend battery life?
Pick the shortest timeout that still lets you finish the task – 15 seconds is usually enough for a bathroom dash, 30 seconds for a stairwell. Then dial the ambient‑light threshold toward “darker” so the sensor stays asleep in bright hallways. Use high‑capacity alkaline or rechargeable NiMH AA cells; they maintain voltage longer than cheap cheap‑price batteries. Finally, wipe the sensor dome quarterly – dust acts like a constant motion source and can drain power faster than you expect.
Are they safe for kids and pets?
These lights are generally safe because the LED never gets hot enough to burn skin, and the PIR sensor emits no radiation beyond a harmless infrared field. For children, choose a model with a low‑brightness amber setting – it’s soothing and less likely to disturb sleep. If you have curious cats or dogs, look for a pet‑ignore switch or a sensor that only reacts to motion faster than 0.5 m/s; that way a pet’s leisurely stroll won’t trigger the lamp.
What should I look for when choosing a model?
When you shop, start with the detection range – 3‑6 ft covers most hallways, while a closet can get by with 2‑3 ft. Next, check whether the timer is adjustable; fixed 15‑second units are cheap but often too short for stairs. Power source matters too: battery‑only units are portable, but plug‑in models eliminate the need for replacements. Finally, glance at the brightness levels – a warm amber for bedrooms and a brighter white for stairs give the right amount of visibility without blinding anyone.
What are common issues and how do I troubleshoot them?
If the light never turns on, the first thing to verify is power – a dead AA or a loose plug will silence even the smartest sensor. Next, wave your hand in front of the dome; a quick flash means the circuit is alive but the ambient‑light dial may be set too sensitive. False triggers from pets or HVAC vents are usually fixed by lowering the unit to about 4‑5 ft and rotating the sensor upward. Finally, keep the lens clean; a dust‑covered dome can both delay activation and drain the battery faster than you think.
Conclusion
We've walked through everything from the tech inside cheap led motion sensor night lights to the nitty‑gritty of picking the right model for each room.
Think about the last time you fumbled in the dark – that awkward moment when the hallway stayed black and you almost tripped. Now picture that same space lit up just as you step into it, no switch, no glare. That's the simple safety win these tiny lights deliver.
So, what’s the takeaway? First, match detection range and timer to the task: 3‑foot, 15‑second units for closets, 6‑foot, 30‑second for hallways, and a longer‑range, brighter option for stairs. Second, give the sensor a clear line of sight and set the ambient‑light dial toward “darker” to keep false triggers – and battery drain – at bay.
Finally, treat maintenance like a quick check‑up: swap batteries every few months, wipe the dome, and run a walk‑test after any adjustment. It only takes a minute, and you’ll keep the glow reliable night after night.
Ready to upgrade your home’s night‑time safety without breaking the bank? Grab the model that fits the room, set it up, and enjoy the peace of mind that comes from a light that’s always there when you need it.
