
Your Shopping Cart


Cheap Virtual Reality Headset Options: Top Picks for Budget Gamers
sunshine.universal.g@gmail.comEver walked into a tech store, saw those sleek VR rigs, and thought, "I'll never afford that"?
You're not alone. The price tag on high‑end rigs can feel like a small loan, and most of us just want to dip a toe into virtual worlds without breaking the bank.
But what if I told you there's a whole ecosystem of cheap virtual reality headsets that still deliver immersive experiences? Think about the first time you tried a roller‑coaster game on a budget device—suddenly the living room turns into a canyon, and the thrill is real, even if the hardware isn’t flagship‑grade.
Here’s the thing: "cheap" doesn’t have to mean "crappy". Many affordable models use clever tricks—like smartphone integration, lightweight optics, and stripped‑down tracking—to keep costs down while preserving the core sense of presence.
So, why do we care? Because a low‑cost headset can be the gateway to a hobby you never imagined. It lets you explore educational tours, workout games, indie adventures, and even social meet‑ups without the financial guilt.
Imagine a weekend with friends, each sporting a budget headset, battling zombies in a shared space, laughing when the tracking glitches, and still feeling that rush of being inside the game. That's the magic we’re after.
Now, you might wonder: will the visual quality suffer? Will it be uncomfortable? Will it work with my phone? Those are valid concerns, and we’ll unpack them later. For now, just know that the market has options ranging from sub‑$100 cardboard viewers to well‑engineered standalone units under $200.
Ready to find the sweet spot between price and performance? Let’s dive in and explore the top cheap virtual reality headsets, what to look for, and how to get the most bang for your buck.
Whether you're a gamer, a teacher, or just curious, a cheap virtual reality headset can open doors you never imagined.
TL;DR
Cheap virtual reality headsets let you dive into immersive games, tours, and workouts without draining your wallet, proving that you don’t need a premium rig to feel the thrill.
We’ll show you the best budget picks, what to look for, and how to maximize comfort and performance, so you can start exploring VR today.
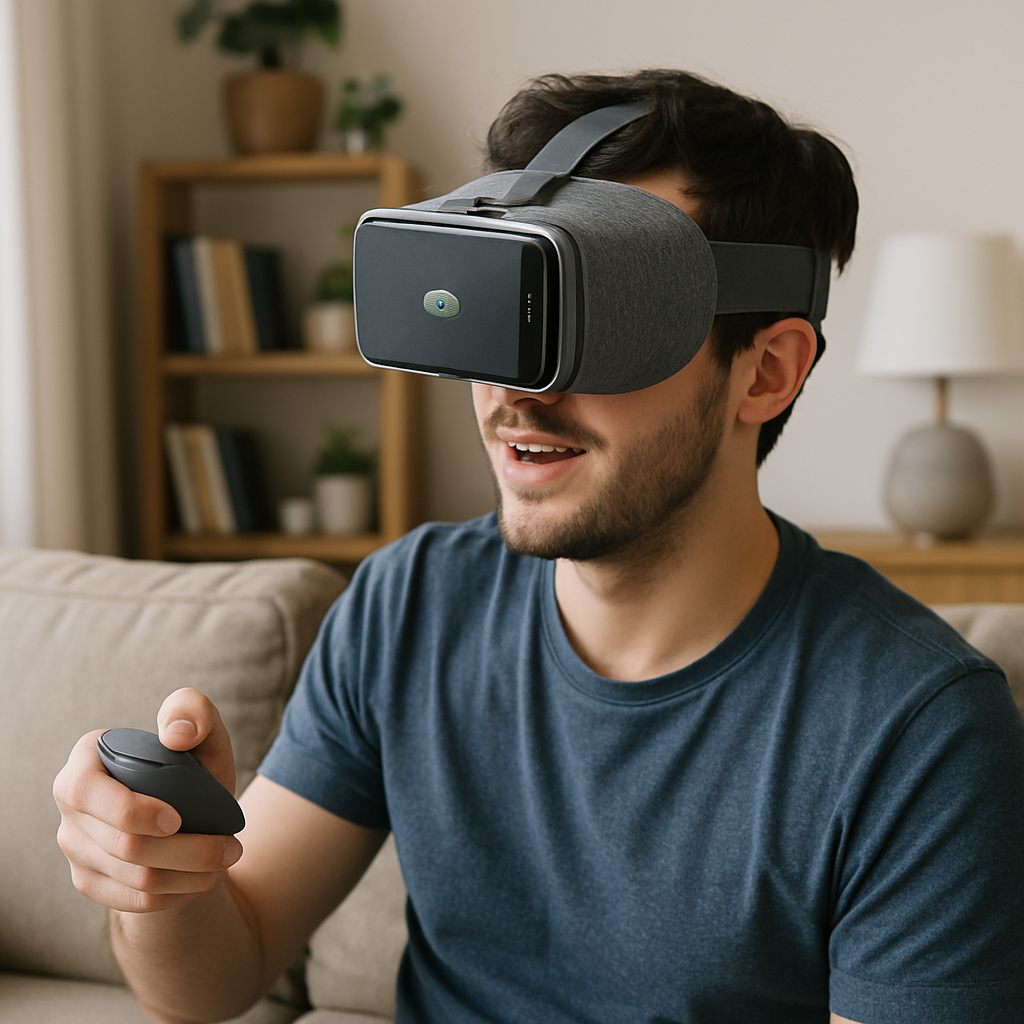
List Item 1: Budget Android VR Headsets
So you’ve got an Android phone that can already snap a decent photo, why not let it take you on a virtual adventure? The good news is there are a handful of cheap virtual reality headset options that slot right onto your phone and don’t ask for a second mortgage.
First up, think about the Atlasonix VR Headset. It’s not cardboard, but a lightweight plastic shell that cradles phones up to 6.3 inches. The padding around the eyes feels surprisingly plush, and the adjustable strap spreads the weight so you don’t end up with a sore forehead after fifteen minutes of zombie‑shooting.
What really sets it apart is the built‑in Bluetooth controller. You can wander through indie titles or explore a museum tour without juggling a phone in your hand. It’s the kind of small upgrade that makes the whole experience feel less like a DIY experiment and more like a legit headset.
Why Android matters
Android phones give you a lot of flexibility. Most budget headsets, including the Atlasonix, rely on the phone’s screen and processor, so you’re not locked into a single ecosystem. That means you can dip into Google Cardboard apps, try out the occasional VR game from the Play Store, or even stream PC‑bound content with a cheap USB‑C link if you’re feeling adventurous.
And if you’re wondering about visual clarity, the Atlasonix adds a simple focal slider so you can dial in the sweet spot for your eyes. No more squinting at a blurry horizon while you’re supposed to be fighting a dragon.
But you might be thinking, "Is there any real performance data?" According to IGN's budget VR headset roundup, phone‑based headsets still lag behind standalone rigs like the Meta Quest, but they deliver a surprisingly immersive experience for under $50 when you factor in the controller.
Tips for getting the most out of a cheap Android headset
1. Choose a phone with at least 3 GB of RAM and a decent GPU (Snapdragon 665 or higher). That way you won’t hit frame‑rate cliffs that make you feel sick.
2. Keep your device cool. A quick vent or a thin silicone skin can stop thermal throttling mid‑game.
3. Use a comfortable strap. Many budget kits ship with a simple elastic band—swap it for a velcro strap if you plan on longer sessions.
4. Grab a Bluetooth controller. Even a basic gamepad turns a static cardboard viewer into a hands‑free adventure.
5. Clean the lenses regularly. Fingerprints are the fastest way to ruin immersion; a microfiber cloth does the trick.
Does any of this sound like more hassle than it’s worth? Not really. The biggest win is that you can try VR without committing to a $300+ headset, and you can always upgrade later once you know you’re hooked.
Here’s a quick visual of what the setup looks like in a living‑room setting.
And if you need a little inspiration, check out this short video that walks through setting up a phone‑based headset, adjusting the fit, and launching a demo app.
Bottom line: a cheap virtual reality headset for Android isn’t just a novelty; it’s a genuine gateway to immersive worlds, educational tours, and even light cardio workouts. With the right phone, a comfy strap, and a cheap controller, you can start exploring virtual reality today without feeling the pinch.
List Item 2: Affordable PC VR Headsets
Okay, you’ve already proved you can make a phone‑based headset work – now let’s talk about stepping up to a proper PC‑connected rig without emptying your savings. The sweet spot lives somewhere between “I can’t afford a $600 monster” and “I want more than cardboard.”
1. Meta Quest 3S – the “budget” champion
When you hear “budget VR headset,” the first name that keeps popping up in the community is the Meta Quest 3S. It basically recycles the Quest 2’s optics (those familiar Fresnel lenses) but slaps the newer Snapdragon XR2 Gen 2 processor and 8 GB of RAM under the hood. That means you get the same smooth performance as the flagship Quest 3, just with a slightly blurrier edge‑to‑edge view.
The price tag is roughly $200 less than the Quest 3, so you’re still looking at a sub‑$400 entry point – a solid compromise if you want standalone freedom plus the option to tether to a PC for Steam titles. Tracking stays on point, the inside‑out cameras work without extra base stations, and the Touch Plus controllers feel lightweight enough for marathon sessions.
According to PC Gamer's budget VR roundup, the Quest 3S is the best budget pick because it “retains a lot of what we like about Meta's more premium product” while shaving off a hefty chunk of cost.
2. Pico 4 Ultra – a worthy alternative (if you can find it)
Not a fan of Meta? The Pico 4 Ultra steps in with a slimmer design, 12 GB of RAM, and a gorgeous LCD panel that rivals the Quest 3’s visual fidelity. It’s technically a “standalone” headset, but it also offers a PC‑VR bridge via the Pico Connect app, so you can stream your Steam library without a cable.
The catch? It’s not sold in the US right now, which makes hunting it down a bit of a treasure‑hunt. Still, if you’re overseas or can snag one from a reseller, the Ultra gives you a premium feel at a price that’s still lower than many high‑end rigs.
3. HP Reverb G2 – keep an eye on sales
The HP Reverb G2 usually lives in the “high‑end” bracket, but it’s been on the market long enough that you’ll occasionally see it drop to under $300 on clearance sites. Its 2160×2160 per eye resolution is insane for the price, delivering a crisp image that almost eliminates the screen‑door effect.
The downside is the weight – it’s heavier than the Quest 3S and Pico 4 Ultra, and the tracking relies on external SteamVR base stations, which adds a bit of setup hassle. If you’re okay with a slightly bulkier headset and already have base stations lying around, a sale‑price Reverb G2 can be a steal for a “cheap virtual reality headset” that feels premium.
So, which one should you pick? Think about three things: how much you want standalone freedom, whether you need the absolute sharpest picture, and if you’re comfortable dealing with external sensors.
Quick decision table
| Headset | Typical Price (USD) | Biggest Pro | Biggest Con |
|---|---|---|---|
| Meta Quest 3S | ≈ $399 | Standalone + PC tether, strong performance | Fresnel lenses aren’t as crisp as pancake lenses |
| Pico 4 Ultra | ≈ $449 (if available) | Slim design, 12 GB RAM, great display | Hard to find in the US |
| HP Reverb G2 (sale) | ≈ $299 (sale) | Highest resolution for the price | Heavier, needs external base stations |
Bottom line: you don’t need to splurge on a $800 monster to get a decent PC VR experience. The Quest 3S gives you a balanced mix of price, performance, and ease‑of‑use; the Pico 4 Ultra offers a sleek alternative if you can track it down; and the HP Reverb G2 can surprise you with a high‑resolution win when it goes on sale. Pick one that fits your budget, your space, and the level of hassle you’re willing to tolerate, then go ahead and plug in – the virtual worlds are waiting.
List Item 3: Standalone VR Headsets Under $200
So you’ve already seen what a phone‑based headset can do and you’ve peeked at the PC‑connected rigs. Now you’re probably wondering if there’s a way to get the full “room‑scale” feel without plugging a tower into your desk – and without blowing your savings.
Good news: a handful of standalone headsets sit comfortably under the $200 mark (especially when you catch a sale or a refurbished unit). They give you inside‑out tracking, built‑in controllers, and a decent display, all without the hassle of external sensors.
Meta Quest 2 (refurbished or on sale)
The Quest 2 has been the go‑to entry‑level VR device for a few years now. Even though the brand has moved on to Quest 3, you can still find brand‑new or certified‑refurbished units for under $200. It packs a Snapdragon XR2 chip, 6 GB of RAM, and the familiar Touch controllers that feel solid in your hands.
Pros: huge library of free and cheap games, wireless freedom, and a robust software ecosystem that updates itself.
Cons: the Fresnel lenses can show a faint “screen‑door” effect, and the headset is a bit on the heavier side for marathon sessions.
Pico Neo 3
Pico’s Neo 3 is a lesser‑known contender that often slips under the $200 radar during flash sales. It sports a pancake‑lens design, which means a slimmer profile and clearer edges compared to the Quest’s Fresnel optics.
Pros: lighter weight, slightly sharper visuals, and a built‑in 64 GB storage option that lets you stash a few big titles without a phone.
Cons: the software store isn’t as massive as Meta’s, and you might run into regional restrictions if you’re buying from outside Asia.
Lenovo Mirage Solo
The Mirage Solo is a bit older – it runs Google’s Daydream platform – but it still delivers a true standalone experience for under $150 on the secondary market. Its built‑in Daydream controller is simple but works well for casual games and 360 video.
Pros: affordable price, decent 5.5‑inch LCD, and a comfortable head strap that distributes weight nicely.
Cons: no access to the newer Oculus store, and tracking can feel a tad less precise in fast‑moving titles.
Now, you might be thinking, “Do these cheap options really let me feel like I’m inside the metaverse?” According to Walmart’s VR headset lineup, having a headset – even an inexpensive one – dramatically boosts immersion, letting you move, touch, and sense virtual objects in a way a phone‑only experience can’t match.
Here’s a quick checklist to make sure you get the most out of a sub‑$200 standalone headset:
- Check the refresh rate – 72 Hz or higher keeps motion smooth and reduces nausea.
- Make sure the headset’s battery life is at least 2‑3 hours for uninterrupted play.
- Look for an adjustable strap and good facial padding; comfort matters more than you think after 30 minutes.
- If possible, buy a model with a built‑in storage option so you don’t have to rely on a phone’s memory.
And don’t forget the software side. Even on a cheap headset, you can still snag free experiences like “Rec Room,” “Bait!,” or the occasional SteamVR title via Oculus Link (if you have a modest PC).
So, what’s the next step? Hunt for a sale, compare the specs above, and pick the one that feels right for your budget and play style. You’ll be surprised how far a $199 headset can take you – from exploring ancient ruins to crushing zombies with friends, all from the comfort of your couch.
List Item 4: Mobile Phone Compatible VR Headsets
Ever feel like your phone could do more than just scroll Instagram? It already has a high‑resolution screen, motion sensors, and a decent processor – all the ingredients for a cheap virtual reality headset that fits in your backpack.
So, what’s the deal with phone‑compatible rigs? They let you dip your toe into VR without buying a separate box, and many of them still feel surprisingly immersive once you get the lenses right.
Google Cardboard 2.0 – the ultimate starter
This is the “I have a phone, I can try VR” option that literally costs the price of a coffee. The second‑generation cardboard adds a magnetic button for simple navigation and a more ergonomic cut‑out for your nose.
Pros: ultra‑lightweight, virtually no setup, works with any Android or iOS phone that has at least a 5‑inch display.
Cons: limited field of view, no built‑in audio, you’ll still need a separate controller if you want hands‑free interaction.
BNext G2 – a step up without breaking the bank
The BNext G2 looks more like a cheap headset than a cardboard box. It sports a molded plastic shell, adjustable head strap, and dual lenses with a 90° field of view.
It pairs with a Bluetooth gamepad (often sold in a bundle) so you can play titles like “Rec Room” or “Bait!” without holding the phone. The lenses are interchangeable, letting you fine‑tune focus for different eye distances.
Pros: better optics, comfortable padding, works with most phones up to 6.5 inches.
Cons: slightly heavier, battery life depends on your phone’s drain.
Merge VR – the “feel‑real” option for kids and adults
Merge VR’s foam‑covered shell is designed for long sessions. It includes a built‑in controller that slides into the headset, turning the whole unit into a single, tidy package.
Because the controller uses the phone’s Bluetooth, you can grab objects in games like “Beat Saber Lite” or explore educational tours without any extra gear.
Pros: sturdy foam, good ergonomics, controller included, compatible with both Android and iOS.
Cons: the foam can attract lint, and the field of view is a bit narrower than premium rigs.
Now that you’ve seen a few candidates, here’s a quick checklist to make sure you pick the right cheap virtual reality headset for your phone:
- Phone size: make sure the headset’s cradle fits your device (most accept up to 6.5‑inch screens).
- Processor power: 3 GB RAM or more and a Snapdragon 600‑series (or comparable) keep frame rates smooth.
- Lenses: look for adjustable focus or interchangeable lenses to avoid eye strain.
- Controller strategy: a Bluetooth gamepad or built‑in controller will save you from juggling the phone.
- Comfort: padded head strap and balanced weight are worth a few extra dollars.
And a little secret: if you can borrow a friend’s old phone that meets the specs, you can test a headset before you buy. It’s a cheap hack that saves you from the “it didn’t fit my phone” disappointment.
So, what’s the next move? Grab the headset that matches your phone’s size, pair a controller, and fire up a free app like “Google Cardboard” or “VRidge.” In under ten minutes you’ll be looking around a 360‑degree beach, swinging a sword, or walking through a museum without leaving your couch.
List Item 5: DIY/Modded Cheap VR Headsets
So you’ve already scoped out ready‑made budget rigs, but what if you could tinker a little and get even more bang for your buck?
DIY isn’t just for hobbyists with a garage workshop; it’s a surprisingly practical way to stretch a cheap virtual reality headset into something that feels a lot more premium. The trick is to focus on three cheap upgrades: optics, tracking, and input.
Why a DIY approach can actually save you money
When you buy a plastic shell for $15 you get the basics, but the lenses are usually fixed, the strap is flimsy, and there’s no way to add a Bluetooth gamepad without breaking the bank. By swapping out a few parts you can eliminate eye strain, improve balance, and even attach a Bluetooth controller without breaking the bank.
Think about it this way: a 3D‑printed frame costs a few dollars in filament, a set of Fresnel lenses from an old headset is often free, and a cheap IR sensor module can be scavenged from an old mouse. All together you’ve upgraded a $20 viewer into a headset that rivals $80‑plus models.
Does it sound overwhelming? Not really. Most of the steps are “clip‑in” style, and there are dozens of YouTube walkthroughs that show you how to glue the lenses and thread the strap.
Starter kits you can build for under $30
Here’s a quick checklist of parts you can order on a single budget page:
- Basic cardboard or plastic shell (you can even repurpose an old Google Cardboard).
- Interchangeable lenses – a pair of 45mm Fresnel lenses from a discarded headset or a set of cheap prescription lenses.
- Adjustable head strap – Velcro or elastic webbing you can find at a craft store.
- Bluetooth controller – a cheap 2.4 GHz gamepad or even a used PlayStation DualShock 2.
- Optional IR tracking LEDs and a USB‑C powered micro‑IR receiver (under $5).
Put these together, and you’ve got a headset that fits most phones up to 6.7 inches, has focus adjustment, and stays put during a 30‑minute session.
Modding tricks to boost comfort and optics
First, swap the stock lenses for a set that you can rotate. A simple hinge made from a coffee stirrer lets you dial in the perfect focus for each eye – no more squinting.
Second, add a foam padding strip inside the headband. Cut a piece of memory‑foam from an old pillow, glue it to the strap, and you’ve cut the pressure on your forehead in half.
Third, if you’re prone to motion sickness, line the inside of the headset with a matte anti‑glare film. It reduces stray reflections that can make the world feel “shimmery” when you turn quickly.
Turn a phone headset into a PC‑VR bridge
If you have a modest gaming PC, you can use a free app like VRidge or ALVR to stream PC titles to your DIY headset. All you need is a fast Wi‑Fi 5 or 6 router, and the headset becomes a lightweight “wireless dongle” for SteamVR.
Pair a Bluetooth controller, launch the streaming app, and you’ll be able to walk around a virtual museum or swing a lightsaber in a full‑PC game – all while your homemade rig stays light enough to wear for an hour.
Wondering whether the latency will ruin the experience? In practice, a good 5 GHz connection keeps lag under 30 ms, which is plenty smooth for most indie VR titles.
A quick example: playing classic Doom in VR
One of the most fun ways to test your DIY headset is to run the 1993 classic Doom in virtual reality. The Wingless guide walks you through installing GZDoom‑OpenVR, adding a few mods, and getting head‑tracking to work with virtually any headset as detailed on the site. The whole setup costs less than $20 if you already have a phone and a cheap controller, and the result feels like you’re actually standing in a pixelated hellscape.
What’s cool is that you can swap out weapon models, tweak the HUD size, and even enable “fat weapon” mode to make the guns feel more 3‑D – all without spending a dime on extra software.
Actionable checklist before you start building
- Gather a base headset (cardboard or cheap plastic).
- Source interchangeable lenses (Fresnel or prescription).
- Cut and attach an adjustable strap with foam padding.
- Install a Bluetooth controller and test it with a free VR app.
- If you have a PC, set up VRidge/ALVR for streaming.
- Try a demo like Doom in VR to verify tracking and comfort.
And that’s it – a handful of inexpensive parts, a bit of glue, and you’ve turned a simple viewer into a genuinely usable cheap virtual reality headset that can grow with you.
Ready to get your hands dirty? Pick up the parts tonight, follow the steps, and you’ll be diving into immersive worlds without blowing your budget.
List Item 6: Best Value for Gaming on a Budget
When it comes to gaming, the phrase “best value” usually means you’re hunting for that sweet spot where performance meets price without feeling like you’ve short‑changed yourself.
And that’s exactly what the cheap virtual reality headset market hands you if you know where to look. Below are the three contenders that consistently give gamers the most bang for their buck.
Meta Quest 2 (refurbished) – the all‑rounder
Even though the Quest 3 has stolen the headlines, the refurbished Quest 2 still pops up on sale for under $200 and packs a Snapdragon XR2, 6 GB of RAM, and inside‑out tracking that feels solid for most shooters.
What I love is the library: you get access to Oculus Store titles, PC‑VR via Oculus Link, and a ton of free demos. The headset’s Fresnel lenses aren’t the sharpest, but they’re more than good enough for fast‑paced games like “Beat Saber” or “Population: One.”
Tip: pair it with a cheap third‑party headset strap (you can find one for $10) – the extra padding makes those marathon sessions feel less like a headache.
Pico Neo 3 – the lightweight surprise
If you can snag a Neo 3 during a flash sale, you’re looking at roughly $180 for a headset that uses pancake lenses, meaning a slimmer profile and a slightly clearer edge‑to‑edge view.
It runs on a Qualcomm Snapdragon 845, comes with 6 GB RAM, and includes 64 GB of onboard storage, so you don’t have to rely on a phone’s memory. The controllers feel a touch lighter than Meta’s, which some gamers say reduces wrist fatigue.
Pro tip: enable the “High‑Refresh” mode in the settings; you’ll get a smoother 90 Hz experience that makes zombie‑slicing feel buttery.
HP Reverb G2 (sale) – the resolution champion on a budget
Normally a premium rig, the Reverb G2 drops to the $300‑range when it hits a clearance sale, and that’s a steal for a headset that offers 2160×2160 per eye resolution. The visual fidelity is so crisp you’ll actually notice the texture details on a sword blade in “Half‑Life: Alyx.”
The catch? It’s heavier and needs external SteamVR base stations, so you need a bit of extra space and a couple of cheap sensors (you can find them for $30 each). If you already own a PC‑VR setup, the extra weight isn’t a deal‑breaker – you’re trading a little comfort for a massive jump in visual quality.
Quick checklist for the Reverb G2:
- Make sure you have a decent PC (GPU ≥ RTX 2060, CPU ≥ i5‑9600K).
- Grab a pair of Velcro straps or a custom headband to spread the weight.
- Set up base stations in opposite corners for optimal tracking.
So, which of these should you grab?
If you want a hassle‑free, all‑in‑one experience that you can also tether to a PC, the refurbished Quest 2 is the safest bet. If you crave a lighter headset with a bit more visual polish and don’t mind hunting down a sale, the Neo 3 delivers. And if you’re willing to invest a little extra time in setup for the sharpest image possible, the Reverb G2 on sale is unbeatable.
Here’s a simple decision matrix you can run in your head right now:
- Budget < $200? → Quest 2 (refurb) or Neo 3.
- Prioritize resolution over weight? → Reverb G2 (sale).
- Need PC‑VR compatibility now? → Quest 2 + Oculus Link or Reverb G2.
Bottom line: you don’t have to splurge on a $800 flagship to enjoy immersive gaming. By targeting one of these three cheap virtual reality headsets, you’ll get solid tracking, decent graphics, and a library that keeps you coming back for more – all without emptying your wallet.
Ready to level up? Set a price alert on your favorite retailer, grab the headset that fits your play style, and dive into a game tonight. You’ll be surprised how quickly a budget rig can feel like a serious upgrade.
FAQ
How much should I expect to spend on a cheap virtual reality headset?
If you’re hunting for a cheap virtual reality headset, think $100‑$250 for a solid, usable unit. Refurbished Quest 2 models often land around $150, while brand‑new Pico Neo 3 or HP Reverb G2 on sale can dip just under $300. The sweet spot is where you get inside‑out tracking and a decent display without draining your savings. Remember, you can also snag deeper discounts by watching price‑alert tools or seasonal sales.
Do cheap virtual reality headsets work with PC games?
Absolutely, many budget rigs can bridge to a PC. The Quest 2 (or its refurbished version) supports Oculus Link or Air Link, turning it into a SteamVR gateway. Pico Neo 3 offers a similar PC‑VR bridge via the Pico Connect app. Even the HP Reverb G2, though a bit heavier, plugs straight into SteamVR. Just make sure your PC meets the minimum GPU and USB‑C requirements, and you’ll be gaming on a budget without a cable‑clutter nightmare.
What’s the best way to improve comfort on a budget headset?
Comfort often comes down to simple tweaks you can do yourself. Swap the stock head strap for an aftermarket Velcro or elastic band – they spread the weight more evenly. Add a thin memory‑foam pad behind the facial interface; a cut‑from‑an‑old pillow piece works wonders. These cheap mods can turn a $180 headset into an all‑day companion. Also, tighten the nose pad so the lenses sit snugly over your eyes, reducing pressure points during long sessions.
Are there any health risks or motion‑sickness concerns?
Motion sickness isn’t exclusive to high‑end gear; it’s mostly about frame rate and comfort. Aim for at least 72 Hz refresh and keep your headset’s lenses clean. Take regular 5‑minute breaks, especially when you’re new to VR, and start with slower experiences before jumping into fast shooters. If you feel queasy, try adjusting the IPD (interpupillary distance) and make sure the headset sits snugly but not too tight.
Can I use a cheap headset for fitness or workout apps?
Yes, many budget headsets have access to popular fitness titles like Supernatural, FitXR, or Beat Saber. The Quest 2’s wireless freedom makes it ideal for cardio sessions, while the Pico Neo 3’s lighter build feels less restrictive during squats. Just clear a safe play area, use a mat, and keep your headset’s battery charged – most cheap units give you 2‑3 hours of uninterrupted movement.
How do I know if a refurbished headset is worth buying?
Look for a certified‑refurb program that includes a warranty and a full factory reset. Check the cosmetic condition – minor scuffs are fine, but the lenses should be scratch‑free. Verify that all sensors and controllers pair without glitches; a quick test video on the seller’s page helps. Finally, compare the price to a brand‑new model; if the discount is 30 % or more and the warranty covers at least 90 days, it’s usually a safe bet.
Conclusion
So after scrolling through budget rigs, the picture is clear: a cheap virtual reality headset can actually open doors to immersive worlds without draining your wallet.
We’ve seen that refurbished Quest 2 units, the Pico Neo 3 on sale, and even a modded cardboard viewer each deliver a different flavor of VR, but they share one thing – they let you jump in and start exploring today.
Think about the last time you hesitated because the price tag seemed too high. Now picture yourself swinging a lightsaber in your living room, tracking a workout, or wandering a historic museum, all for under $200.
What’s the next step? Grab a headset that fits your budget and space, run a quick comfort check (strap, IPD, battery), and set a 5‑minute break timer. Those tiny habits keep motion sickness at bay and make the experience feel sustainable.
If you’re still on the fence, remember: you can always start with a cheap phone‑compatible viewer, test a few free apps, and upgrade only when you’re convinced VR is worth the extra pixels.
Bottom line: you don’t need a flagship to feel the future. Pick a cheap virtual reality headset, give it a spin, and let the virtual adventure begin.
Enjoy the ride today.
