
Your Shopping Cart


Smart Choices for Budget Home Gym Equipment: Top Picks Under $200
sunshine.universal.g@gmail.comPicture this: you’ve just watched another pricey home‑gym ad and felt that familiar sting of doubt. Does getting fit really have to cost a small fortune?
I get it—budget worries can freeze any workout plan before you even roll out a yoga mat.
But here’s what I mean: building a functional home gym doesn’t mean splurging on a treadmill that eats up your living room.
You can start with a handful of affordable pieces that still give you a solid strength‑training foundation.
Think dumbbells that adjust from five to fifty pounds, a compact resistance‑band set, and a fold‑away squat rack that slides under your bed when you’re done.
And don’t overlook the power of a simple yoga mat or a sturdy pull‑up bar that hooks onto a doorway—you’ll be surprised how many exercises you can crank out with just those.
Sure, you might wonder if cheap gear will hold up. The truth? Quality doesn’t always come with a sky‑high price tag.
Brands like CAP Barbell and Yes4All have earned solid reputations for making durable, wallet‑friendly equipment that survives years of sweaty sessions.
What matters more is how you use what you have. A clever circuit with bodyweight moves, a couple of kettlebells, and a jump rope can torch calories just as effectively as a pricey elliptical.
So, if you’re staring at your bank account and wondering where to begin, start small, stay consistent, and let the equipment grow with you.
In the next parts of this guide, we’ll break down the top budget home gym equipment categories, compare price points, and show you exactly how to set up a space that feels like your personal fitness sanctuary.
Ready to ditch the excuses and start sweating without breaking the bank? Let’s dive in and build a gym that works for you, not the other way around.
TL;DR
If you’re scared that a solid home gym means spending a fortune, think again—budget home gym equipment like adjustable dumbbells, a sturdy pull‑up bar, and a compact squat rack can give you a full‑body workout without draining your wallet.
Start small, stay consistent, and let your gear grow as you progress—your fitness sanctuary is just a few affordable pieces away.
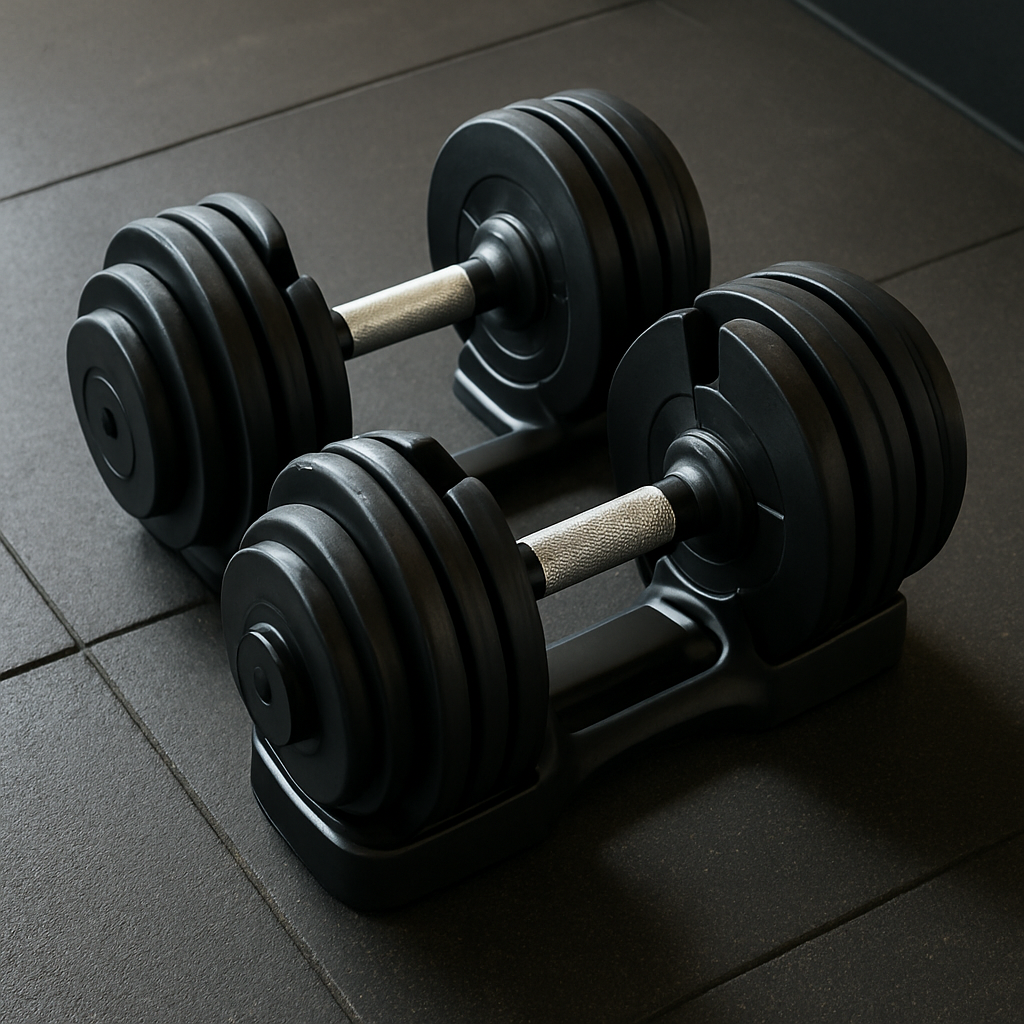
1. Adjustable Dumbbells
Ever stared at a row of dumbbells and thought, “Do I really need all these plates just to get a decent press?” You’re not alone. The truth is, adjustable dumbbells let you swap from 5 lb to 50 lb in seconds, so you get the full range of strength work without the garage‑full of metal.
And that’s the magic ingredient for budget home gym equipment: you get maximum versatility while keeping floor space and price tags in check.
Space‑saving design
Imagine you’ve got a living‑room that doubles as a work‑from‑home office. A traditional dumbbell rack could eat up half the square footage, but a single pair of adjustable dumbbells sits neatly on a shelf. You can roll them under a couch when you’re done, freeing up room for yoga mats or a pull‑up bar.
One real‑world example: Sarah, a busy mom in a two‑bedroom apartment, swapped three 15‑lb fixed pairs for a set of Bowflex SelectTech 552. She now benches, curls, and does lunges on the same pair, and the dumbbells barely take up space on her closet floor.
Cost per pound
Buying individual plates adds up fast. Ten 5‑lb plates, ten 10‑lb plates, and a rack can easily exceed $300. An adjustable set that covers 5‑50 lb usually lands between $120‑$180, giving you roughly $2‑$3 per pound of load.
That price difference means you can redirect the saved cash toward a sturdy pull‑up bar or a set of resistance bands—another win for a well‑rounded budget home gym.
Ease of progression
Progressive overload is the cornerstone of strength gains, but hunting for the next plate can be a mental hurdle. With adjustable dumbbells you just twist a dial or slide a selector pin, add a 5‑lb increment, and you’re ready to hit that extra rep.
Here’s a quick step‑by‑step you can follow each week:
- Pick a base weight you can lift for 8‑10 reps with good form.
- Record the number of reps you actually complete.
- If you hit the top of the rep range, increase the weight by the next 5‑lb step.
- Repeat. In four to six weeks you’ll see a noticeable strength jump without ever leaving the house.
Real‑world durability
Budget doesn’t have to mean flimsy. Brands like CAP Barbell and Yes4All use chrome‑plated steel handles and reinforced locking mechanisms that survive daily use. A user review on a major retailer site noted that after 18 months of twice‑daily workouts, the selector pins still felt as tight as day one.
If you’re skeptical, do a simple test before you buy: give the handle a firm twist and make sure it locks solidly. A loose‑feeling click is a red flag, even if the price looks tempting.
Quick setup for workouts
Because the weight changes in a flash, you can design supersets that swing from a heavy chest press to a light shoulder raise without pausing for plate changes. That keeps your heart rate up and burns more calories—perfect for a time‑crunched schedule.
Try this mini‑circuit three times a week:
- Flat dumbbell press – 12 reps at 30 lb
- Renegade rows – 10 reps each side at 20 lb
- Goblet squat – 15 reps at 35 lb
Transition between each move in under 10 seconds, and you’ll get a full‑body blast in under 15 minutes.
So, does an adjustable set really cover every angle you need? In most home‑gym scenarios, yes. It replaces a whole rack of fixed weights, saves space, and keeps the cost low enough to let you add complementary gear later.
Take the next step: pick a set that tops out at least 50 lb, test the lock mechanism in‑store if you can, and start logging your weekly weight increments. Within a month you’ll see the confidence boost that comes from knowing your budget home gym equipment can grow right alongside you.
2. Resistance Bands Set
Ever wonder why a simple loop of rubber can replace a whole rack of machines? That's the magic of resistance bands – they’re cheap, portable, and surprisingly effective for a full‑body workout.
1. They work everywhere, for every goal
Whether you’re cramped in a studio apartment or taking a break on the balcony, bands fold up like a sleeping bag. You can yank them for a squat, stretch them for a chest press, or anchor them to a door for rows. Rowing coaches swear by bands because the tension can be dialed up simply by stepping farther away.
2. Budget‑friendly without skimping on load
Typical sets run $20‑$40 for a range of light to heavy tensions. Compare that to a single dumbbell that costs the same and only gives you one weight. No hidden fees, no pricey plates – just elastic that lasts years if you keep an eye on fraying.
3. Covers the whole strength spectrum
Light bands (10‑20 lb) are perfect for activation drills, mobility work, and rehab. Heavy bands (50‑100 lb) can mimic the pull of a rowing machine or give you a solid deadlift alternative. Because you can stack two bands, you instantly create intermediate levels without buying extra gear.
4. Creative exercise ideas that keep things fresh
Here’s a quick circuit you can slam together in under ten minutes:
- Band‑assisted push‑ups – 12 reps
- Standing rows anchored to a door – 15 reps each side
- Band‑deadlifts (stand on the band, hinge, and pull up) – 10 reps
- Overhead press with the band looped around your back – 12 reps
Move from one move to the next with less than five seconds of rest. The constant tension keeps your heart rate up, so you’re burning calories while building strength.
5. Buying tips to avoid cheap‑shot disappointment
Look for bands that list tensile strength in pounds and come with a durability guarantee. Latex blends tend to snap less than pure rubber. A good set includes a door anchor, a carry bag, and a printed resistance chart – that way you know exactly how much load you’re pulling.
And if you can, test the band’s snap by pulling it firmly before you buy. A solid “pop” that doesn’t feel like it’s about to snap is a good sign.
So, does a resistance band set really belong in a budget home gym? Absolutely. It gives you the variety of a full weight rack, the portability of a yoga mat, and the price point of a cheap jump rope.
Ready to give it a try? Grab a set that includes at least three tension levels, set up a quick anchor, and run the circuit above three times a week. In a month you’ll notice smoother rows, stronger presses, and a confidence boost that comes from knowing you’ve got a versatile tool that won’t break the bank.
Tip: treat the band like a dumbbell. Write down the tension level you used for each exercise and aim to increase it by one notch every two weeks. That simple progression keeps you getting stronger without ever needing a heavier set.
3. Foldable Weight Bench
Ever felt that pang of disappointment when you realize the bench you need won’t fit through your apartment door? I hear you. A good bench can turn a simple dumbbell press into a full‑body sculpting session, but space is often the biggest budget enemy.
Enter the foldable weight bench – the unsung hero of budget home gym equipment. It collapses flat for storage, yet pops back up sturdy enough for heavy dumbbell work. And the best part? You don’t have to sacrifice stability or adjustability just to keep the floor clear.
1. Space‑saving hero
Think about the last time you tripped over a bulky rack while reaching for a water bottle. A fold‑up bench typically folds to a thickness of 4‑6 inches, meaning you can tuck it under a bed, slide it into a closet, or even lean it against a wall when you’re done. That kind of flexibility is priceless when you’re paying rent for a studio.
2. Stability you can trust
Many beginners worry a collapsible frame will wobble under load. Good models use heavy‑gauge steel and a wide‑base footplate, giving you a rock‑solid platform for 150 lb+ dumbbell presses. The design often includes lock‑pins that click into place, so you know the bench is truly locked before you load it.
3. Versatility without the price tag
Adjustable back angles let you switch from flat presses to incline chest work, seated shoulder presses, and even decline sit‑ups. You get the full FID (Flat/Incline/Decline) experience without buying three separate benches. A recent guide calls a foldable option “one of the best budget weight bench options. Affordable, foldable, and still offers FID bench versatility” according to a specialist review.
4. Real‑world example
Meet Alex, a remote‑worker who lives in a 550‑sq‑ft loft. He swapped his old 30‑lb static bench for a York ASPIRE 220 folding multi‑purpose bench. The bench folds flat in under 30 seconds, fits in his hallway, and holds up to 250 lb. Since the switch, Alex has added incline dumbbell flyes and decline crunches to his routine, all without cramming his living room.
5. Quick buying checklist
Before you click “add to cart,” run through this short list:
- Maximum weight capacity ≥ your heaviest dumbbell pair.
- Number of angle positions ≥ three (flat, incline, decline).
- Fold‑flat thickness ≤ 6 inches for easy storage.
- Locking mechanism that feels solid when you hear a firm click.
- Warranty of at least one year – a sign the manufacturer trusts its build.
Cross‑checking these items saves you from a bench that squeaks or collapses after a few months.
Comparison table
| Bench model | Key feature | Typical price (USD) |
|---|---|---|
| York ASPIRE 220 | Fold‑flat, 3‑position FID, 250 lb capacity | $149‑$179 |
| USA Sports GWS‑FID | Compact steel frame, 4‑position adjust, 200 lb capacity | $129‑$159 |
| Compact Fold‑Flat Bench | Ultra‑light aluminum, 2‑position (flat/incline), 150 lb capacity | $99‑$119 |
Pick the one that matches your space, load needs, and budget. If you’re just starting, the ultra‑light option gives you the feel of a bench without a big price tag. As your strength grows, upgrading to a higher capacity model keeps your setup future‑proof.
Bottom line: a foldable weight bench is the single piece of budget home gym equipment that bridges the gap between cramped apartments and serious strength work. Grab one, test the lock, and watch your home workouts expand from “just push‑ups” to full‑bench presses, incline curls, and decline sit‑ups – all without turning your living room into a storage unit.
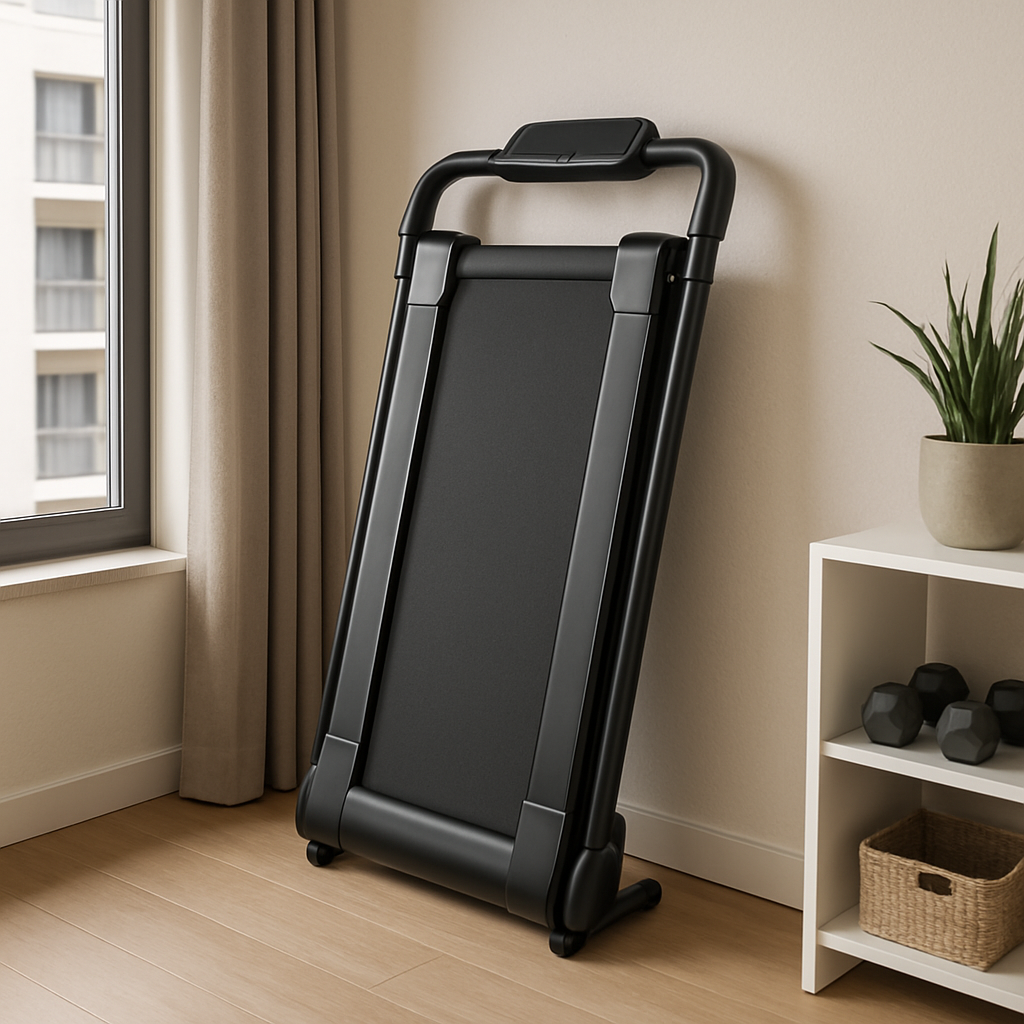
4. Compact Treadmill
Ever looked at a full‑size treadmill and thought, “That thing will never fit in my apartment”? Yeah, I’ve been there. The good news is you don’t need a gym‑grade beast to get solid cardio at home.
1. Space‑saving design you can actually live with
Compact models typically fold up to a footprint of about 30×20 inches and a height under 5 inches. That means you can slide it under a sofa, stash it in a closet, or even keep it in a garage corner when you’re not using it. One reviewer called the folded size “the size of a large suitcase” – perfect for studio‑style living.
2. Price points that stay in the budget lane
When you hunt for “budget home gym equipment”, treadmills often get a bad rap for being pricey. But several brands now ship models for $400‑$600 that still deliver a reliable belt, a decent motor (2.0–2.5 HP), and basic incline. Those numbers line up with the “budget picks” highlighted by Garage Gym Reviews' treadmill guide, which points out that you can get a solid cardio machine without blowing your savings.
3. Real‑world examples that prove it works
Take Maya, a freelance graphic designer who lives in a one‑bedroom loft. She bought a fold‑able 2.0 HP treadmill for $449. After a few weeks she was running three miles a day, and the machine never rattled when she stored it in the hallway. The next month she upgraded her dumbbell set, but the treadmill still fit neatly beside the bench.
Then there’s Jamal, a college student sharing a small dorm room. He opted for a budget treadmill with a manual incline and a compact fold‑up frame. He uses it for HIIT intervals – 30 seconds sprint, 30 seconds walk – and the whole routine fits in a 20‑minute window before his next class.
4. Actionable checklist before you click “add to cart”
- Maximum belt length ≥ 55 inches (so you can comfortably accommodate a full stride).
- Motor rating 2.0 HP or higher for consistent speed up to 10 mph.
- Folding mechanism that locks securely and can be operated with one hand.
- Weight capacity at least 250 lb to future‑proof as you get stronger.
- Basic console with speed/incline controls – you don’t need fancy Bluetooth if you’re saving cash.
Running through this list on a product page saves you from buying a treadmill that “looks great” but can’t handle your stride or your growing fitness level.
5. How to integrate a compact treadmill into your budget gym routine
Step 1: Warm up with 3‑5 minutes of walking at a comfortable pace. That gets the blood flowing without over‑loading the motor.
Step 2: Choose a cardio focus. If you’re after calorie burn, try 20‑minute HIIT: 30 seconds fast, 30 seconds recover. If you prefer steady‑state, aim for 30 minutes at a moderate 5–6 mph.
Step 3: Pair it with bodyweight moves. After each treadmill interval, hop off and do 10 push‑ups or 15 air‑squats. This keeps the heart rate high and maximizes the “budget home gym equipment” combo effect.
Step 4: Cool down with a 2‑minute slow walk, then stretch the calves and hamstrings. You’ll notice less soreness and a quicker return to your next session.
6. Pro tip from the pros
Many seasoned home‑gym owners suggest using a treadmill mat. It protects both your floor and the treadmill’s deck, extending the life of a budget machine. A cheap rubber mat costs under $30 and can be rolled up alongside the folded treadmill.
And if you’re worried about noise, look for a model with a “quiet belt” or a belt made of cushioned material. Those designs absorb impact and keep the neighbor’s cat from being startled.
Bottom line: a compact treadmill can be the cardio cornerstone of your budget home gym without stealing your living space or your paycheck. Pick one that folds, checks the motor and weight specs, and you’ll have a reliable running partner that slides out of sight whenever you need the floor for yoga or strength work.
5. Multi‑Function Home Gym Station
Ever walked into a cramped living room and thought, "I need a full‑body workout but I only have one corner?" Yeah, I’ve been there. That’s why a multi‑function home gym station can feel like a secret weapon for anyone on a budget.
Instead of scattering dumbbells, a bench, and a pull‑up bar around the floor, you get a single piece that folds, slides, and transforms. The result? More reps, less clutter, and a clear path to the fridge after you finish.
Why a stack‑gym beats a pile of separate gear
Most stack gyms combine cable pulleys, a low‑row station, and a leg press in one compact frame. That means you can do rows, chest flyes, triceps pushdowns, and even squat variations without buying a separate machine for each movement.
One real‑world example: Jenna, a freelance writer in a 400‑sq‑ft studio, swapped three pricey machines for a Marcy Pro’s stack gym. She now squeezes in a 45‑minute circuit that hits every major muscle group, and the whole unit folds flat against the wall when she needs space for yoga.
Space‑saving tricks you’ll love
- Measure first. Sketch your floor plan and mark a 6‑ft by 8‑ft rectangle – most stack gyms fit comfortably within that footprint.
- Use the vertical. Many stations have a power‑tower side with pull‑ups, dips, and leg raises, so you’re using height instead of floor space.
- Fold and lock. After your workout, collapse the bench and slide the unit under a couch or into a closet. A single hand‑lever usually does the trick.
Does that sound too good to be true? Not when you check the specs before you buy.
Checklist before you click “add to cart”
- Weight capacity ≥ 250 lb – future‑proofs your progress.
- Adjustable seat and backrest – you’ll need flat, incline, and decline positions for chest presses, shoulder work, and core drills.
- Cable resistance range ≥ 100 lb – enough to challenge you without needing extra plates.
- Footprint ≤ 6 × 8 ft – guarantees it fits in most apartments.
- Warranty of at least one year – a sign the manufacturer stands behind the build.
Cross‑checking these items saves you from a wobbly bench that creaks after a month of deadlifts.
Three budget‑friendly ways to use the station
1. Full‑body circuit. Load the low‑row cable for 12 reps of seated rows, hop to the bench for 10 reps of dumbbell presses (you can still keep your adjustable dumbbells handy), then finish with 15 body‑weight dips on the power‑tower. Cycle three times, rest 60 seconds, and you’ve burned a solid 400 calories.
2. Strength‑focused split. On Monday, use the leg‑press attachment for squats; on Thursday, switch to the chest‑press cable and do 4 × 8 reps. Because the machine stays in one spot, you never waste time hunting for the next piece of equipment.
3. Rehab & mobility. The low‑profile pulley lets you do light band‑assisted shoulder rotations, while the vertical tower gives you controlled knee‑to‑chest raises. Perfect for days when you’re easing back from an injury but still want to move.
Pro tip: Pair with budget accessories
Grab a set of resistance bands (under $30) and loop them through the cable pulleys for extra tension without buying a heavier stack. Add a sturdy floor mat to protect both your floor and the machine’s base – it also dampens noise for apartment living.
Think about it this way: the station is your gym’s “engine,” and the bands, mats, and a jump rope are the fuel that keeps it running smoothly.
Real‑world numbers that matter
According to a recent review of budget home gyms, a quality stack unit can replace up to eight separate pieces of equipment, saving anywhere from $200 to $500 in extra purchases. That’s a huge win when every dollar counts.
And if you’re still skeptical about durability, many users report that the steel frames hold up for years with daily use, even when they’re the only piece of equipment in a 500‑sq‑ft apartment.
Take action today
1️⃣ Measure your workout zone and note the max dimensions.
2️⃣ Write down the three features you can’t live without (e.g., pull‑up bar, leg press, cable range).
3️⃣ Compare two stack‑gym models side‑by‑side using the checklist above.
4️⃣ Place a $25‑$30 rubber mat under the unit for protection.
5️⃣ Start a simple 3‑day circuit and track your progress for the first four weeks.
When you look at that single piece of equipment, you’ll realize you’ve essentially bought a mini‑gym that fits behind your couch. No more excuses, no more “I don’t have space.” Just a solid, budget‑friendly foundation that grows with you.
6. Jump Rope & Skipping Tools
Picture this: you’ve just wrapped up a quick dumbbell circuit, the sweat’s still dripping, and you need something that spikes your heart rate without stealing another square foot. That’s where a jump rope slides in – cheap, portable, and surprisingly effective.
1. The price tag that makes you smile
Unlike a treadmill or a set of plates, a basic rope can be found for under two bucks at a thrift store. Goodwill even lists a jump rope starting at $1.99, proving you don’t need to break the bank to get a solid cardio tool according to a budget‑friendly guide. That price includes a piece of PVC or beaded rope and a pair of handles – enough to start burning calories right away.
2. Why skipping beats “just another cardio machine”
First, it’s a full‑body workout. Each turn engages calves, quads, glutes, shoulders, forearms, and even core stability as you keep the rope’s arc tight. Second, the interval nature of rope work (30 seconds fast, 30 seconds rest) spikes your VO₂ max while keeping the session under 10 minutes. And because you can swing it in a hallway, a living‑room, or on a balcony, you never have to schedule a slot on a crowded gym floor.
3. Picking the right rope without over‑thinking
Here’s a quick 4‑week progression you can follow, no fancy equipment needed:
- Length matters. Stand on the middle of the rope; the handles should reach your armpits. Trim a beaded rope if it’s too long – a quick cut won’t ruin performance.
- Material choice. PVC is smooth and cheap, perfect for beginners. Beaded ropes give you audible feedback, which helps maintain rhythm. If you’re serious about speed, look for a lightweight speed rope with swivel bearings.
- Grip comfort. Foam‑wrapped handles reduce blisters. Some budget sets even include a small wrist strap – a nice bonus for longer sessions.
4. Turning a $2 rope into a training powerhouse
Here’s a quick 4‑week progression you can follow, no fancy equipment needed:
- Week 1 – Foundation. 3 rounds of 30‑second easy jumps, 30‑second rest. Focus on timing, keep elbows close, and land softly on the balls of your feet.
- Week 2 – Endurance. Add a second round, increase each interval to 45 seconds, and throw in side‑to‑side jumps to challenge coordination.
- Week 3 – Intensity. Introduce high‑knees or double‑unders for 20‑second bursts, followed by 40 seconds of steady jumping.
- Week 4 – Circuit integration. Pair 1 minute of rope work with 10 push‑ups, 15 air‑squats, then repeat 5 times. You’ll feel the cardio burn while still hitting strength moves.
Notice how each week builds on the last? That’s the same progressive overload principle you use with dumbbells, just applied to a rope.
5. Pro‑tips to keep the rope alive (and your floors happy)
- Use a thin gym mat or an old yoga mat under the rope. It protects hardwood and cushions your joints.
- Store the rope loosely coiled, not tightly wound. Tight coils can kink the cable and shorten its lifespan.
- Rotate handles occasionally if they start to feel loose – a quick screw‑tighten does the trick.
- Mix up footwork: try boxer steps, criss‑crosses, or single‑leg hops. Variety prevents boredom and improves balance.
And if you ever wonder whether you’re “just skipping rope” or actually getting a solid workout, remember this: a 10‑minute high‑intensity rope session can burn 120‑150 calories, comparable to a 30‑minute jog, but it only takes up a foot‑long piece of space.
6. Bottom line – the rope is your budget gym’s secret weapon
When you’re juggling adjustable dumbbells, a fold‑up bench, and a compact treadmill, the jump rope is the lightweight sidekick that never clutters the room. It costs pennies, fits in a drawer, and can be cranked into a HIIT finisher whenever you need that extra calorie burn. So grab a rope, test the length, and start skipping – your wallet and your heart will thank you.
Conclusion
We’ve walked through the nuts and bolts of building a solid workout space without blowing your budget, from adjustable dumbbells to that trusty jump rope.
Think about how far you’ve come: a handful of versatile pieces, a floor that stays intact, and a routine that actually fits into your life.
Does any of this feel overwhelming? It shouldn’t. The beauty of budget home gym equipment is that each item does double duty – a bench becomes a step‑up, bands turn into resistance for rows, and the rope spikes your cardio in five‑minute bursts.
So, what’s the next move? Grab one piece you’re missing, test it in your space, and commit to a quick 10‑minute circuit tomorrow. You’ll see progress before the week is over.
Remember, consistency trumps perfection. Even a modest setup will keep you moving, burning calories, and building strength.
Ready to stop scrolling and start sweating? Pick the gear that excites you most, set a timer, and make today the day your budget home gym finally comes to life.
Finally, give yourself a simple tracking habit: write down the equipment you used, the reps or minutes, and one thing you enjoyed. Over a month you’ll spot patterns, celebrate small wins, and know exactly when it’s time to upgrade another piece.
FAQ
What is the best budget home gym equipment for a small apartment?
When space is tight, adjustable dumbbells and a fold‑up bench give you the biggest bang for your buck. The dumbbells swap weights in seconds, so you can do presses, rows, and curls without a rack. Pair them with a bench that folds flat under a couch, and you’ve got a full‑body kit that fits in a closet.
Because both pieces are versatile, you’ll rarely need another machine. Look for a dumbbell set that tops out at 50 lb and a bench with a 250‑lb capacity – that combo covers most strength moves while staying under $300 total.
How often should I replace budget home gym equipment?
Most budget gear lasts a few years if you treat it right. For dumbbells, check the lock mechanism every few months; a loose click means it’s time to replace the set. Benches should feel rock‑solid when you sit or load them – any squeak or wobble that won’t go away after tightening bolts is a red flag.
Resistance bands are the most disposable piece; replace them once you notice fraying or a loss of tension, usually after 6‑12 months of heavy use. A good rule of thumb: if the equipment feels unsafe or impedes your form, swap it out before you get injured.
Can I get a full‑body workout with just three pieces of equipment?
Absolutely. Combine adjustable dumbbells, a foldable bench, and a set of resistance bands, and you’ve got press, pull, squat, hinge, and core moves covered. Use the bands for rows, glute bridges, and shoulder activation, then switch to dumbbells for presses, curls, and lunges. The bench adds incline, decline, and step‑up variations, turning simple lifts into multi‑angle challenges.
Because each item does double duty, you’ll spend less time swapping gear and more time moving. A 20‑minute circuit that rotates through these three tools can burn calories, build strength, and keep your heart rate up without needing a pricey machine.
Is a jump rope still worth it if I already have a treadmill?
Yes, even a compact treadmill benefits from a rope finisher. Jump ropes cost pennies, take up a foot of floor space, and boost coordination, foot speed, and VO₂ max in under five minutes. After a treadmill interval, grab the rope for a quick 30‑second burst – you’ll finish the workout feeling energized and your cardio capacity will improve faster.
Plus, the rope is portable enough to use on a balcony or in a hotel room, so you never lose the cardio edge when you’re away from the treadmill.
How do I keep my budget equipment from damaging the floor?
Lay down a cheap rubber mat or a thick yoga mat under any weight‑bearing piece. The mat protects hardwood, tiles, or carpet from dents and scratches, and it also dampens noise – a win for both you and the neighbor below.
For dumbbells and bands, a small interlocking foam tile works well. For the bench, a 1‑inch plywood board under the legs adds stability and prevents wobble on uneven surfaces. These simple additions cost under $20 total and extend the life of both your floor and your gear.
What’s the easiest way to track progress with budget home gym equipment?
Grab a notebook or a notes app and jot down three things after every session: the equipment used, the weight or tension level, and a quick note on how you felt. Over a week you’ll spot patterns – maybe you’re crushing 30‑lb dumbbell presses but still struggling with 40‑lb bands.
Seeing the data on paper makes it crystal clear when it’s time to up the weight or add a new movement. Consistent tracking also fuels motivation because you can literally watch your strength climb month by month.
